FlutterFlow + Groq: Fast & Powerful Cross-Platform Apps
FlutterFlow is a visual development platform to build high-quality, custom, cross-platform apps. By leveraging Groq's fast AI inference in FlutterFlow, you can build beautiful AI-powered apps to:
- Build for Scale: Collaborate efficiently to create robust apps that grow with your needs.
- Iterate Fast: Rapidly test, refine, and deploy your app, accelerating your development.
- Fully Integrate Your Project: Access databases, APIs, and custom widgets in one place.
- Deploy Cross-Platform: Launch on iOS, Android, web, and desktop from a single codebase.
FlutterFlow + Groq Quick Start (10 minutes to hello world)
1. Securely store your Groq API Key in FlutterFlow as an App State Variable
Go to the App Values tab in the FlutterFlow Builder, add groqApiKey as an app state variable, and enter your API key. It should have type String and be persisted (that way, the API Key is remembered even if you close out of your application).
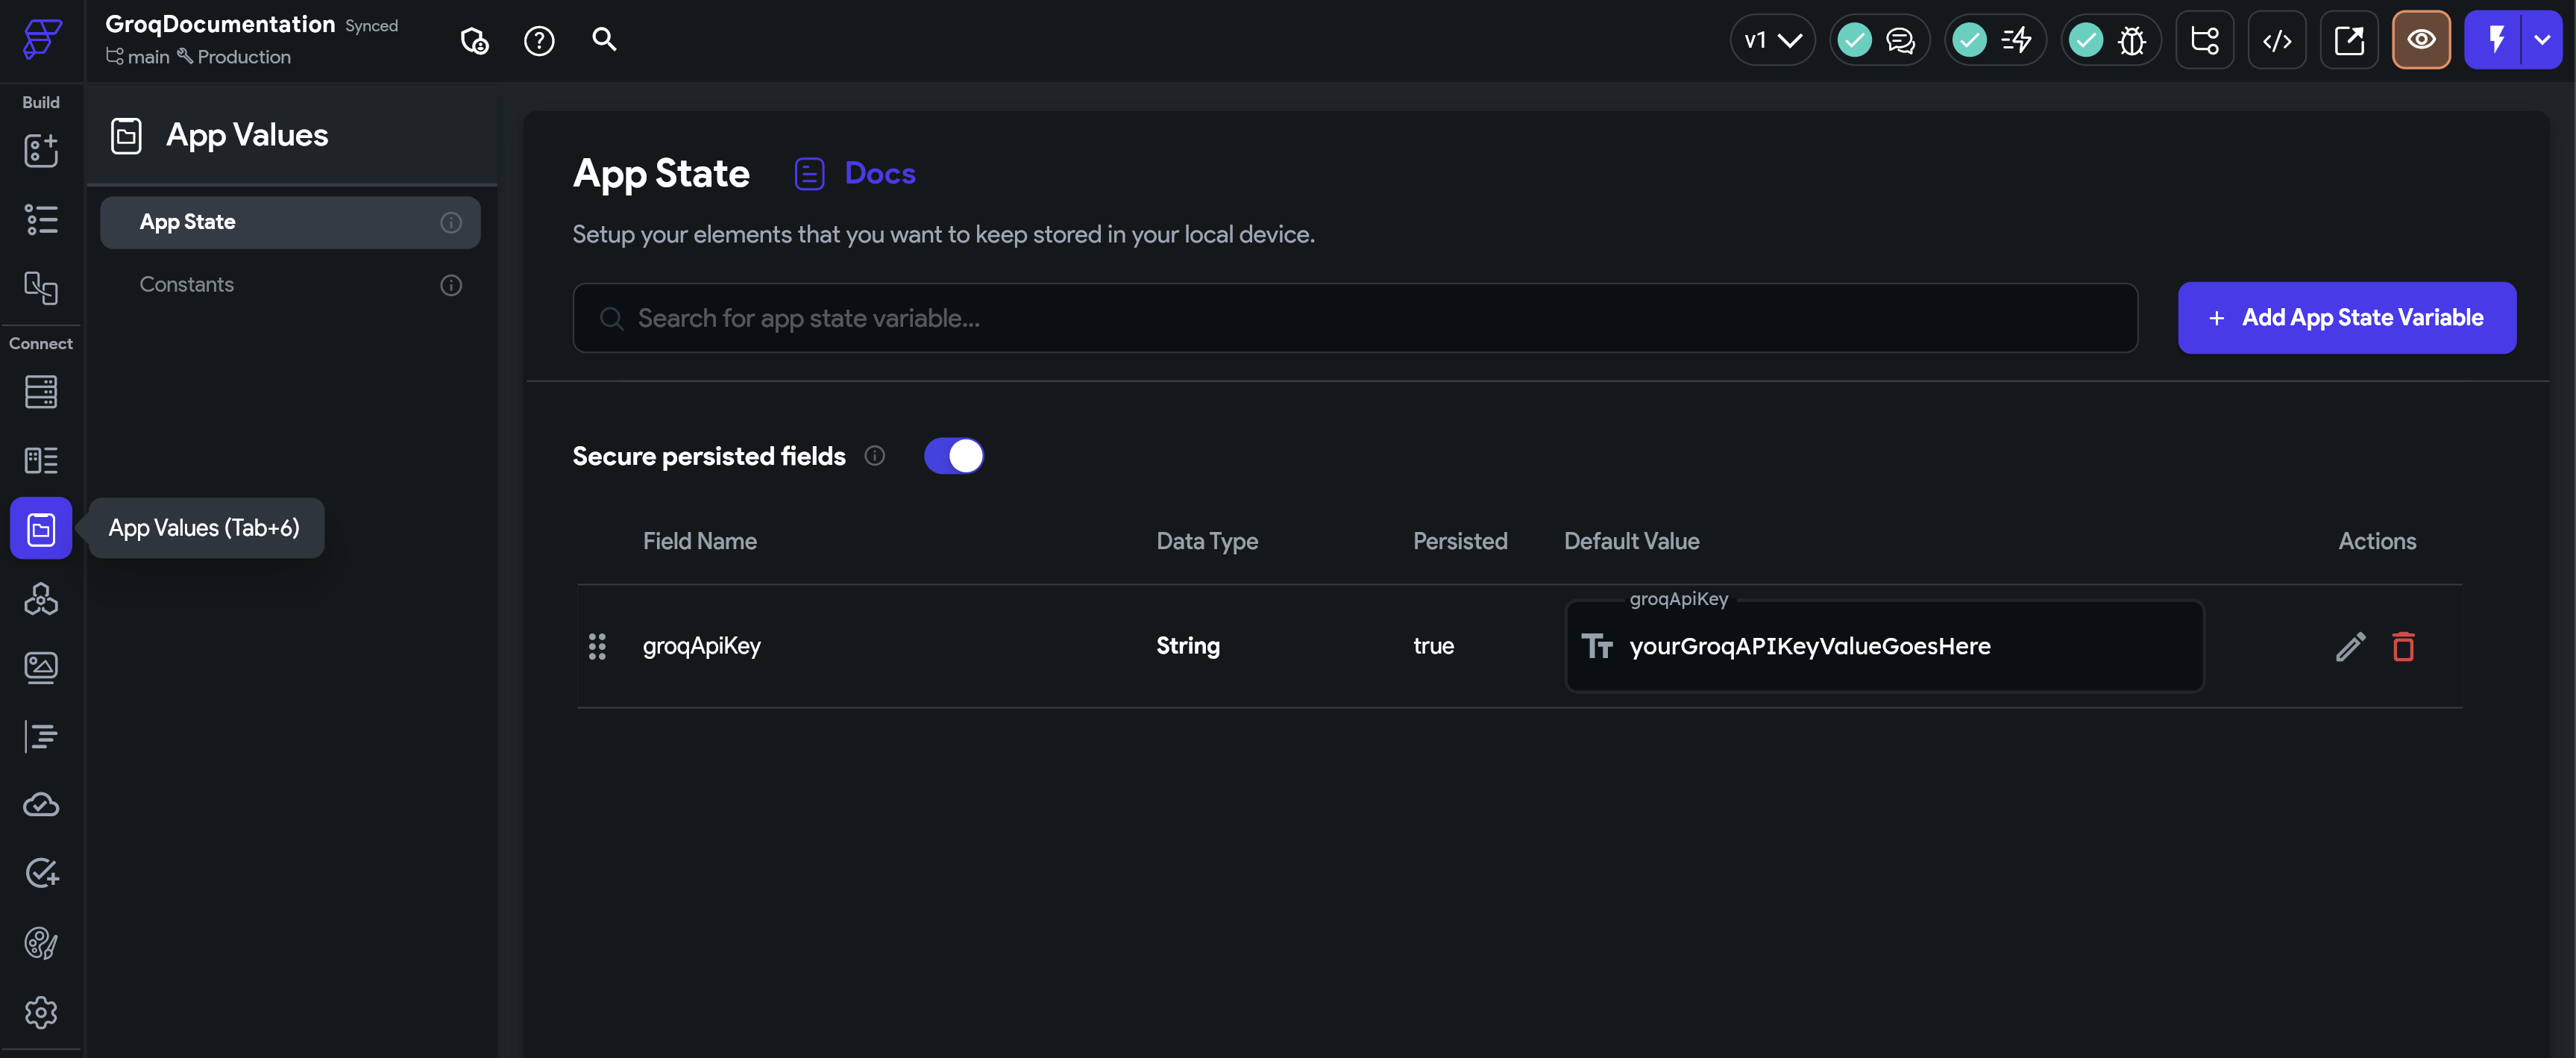
Store your api key securely as an App State variable by selecting "secure persisted fields"
2. Create a call to the Groq API
Next, navigate to the API calls tab
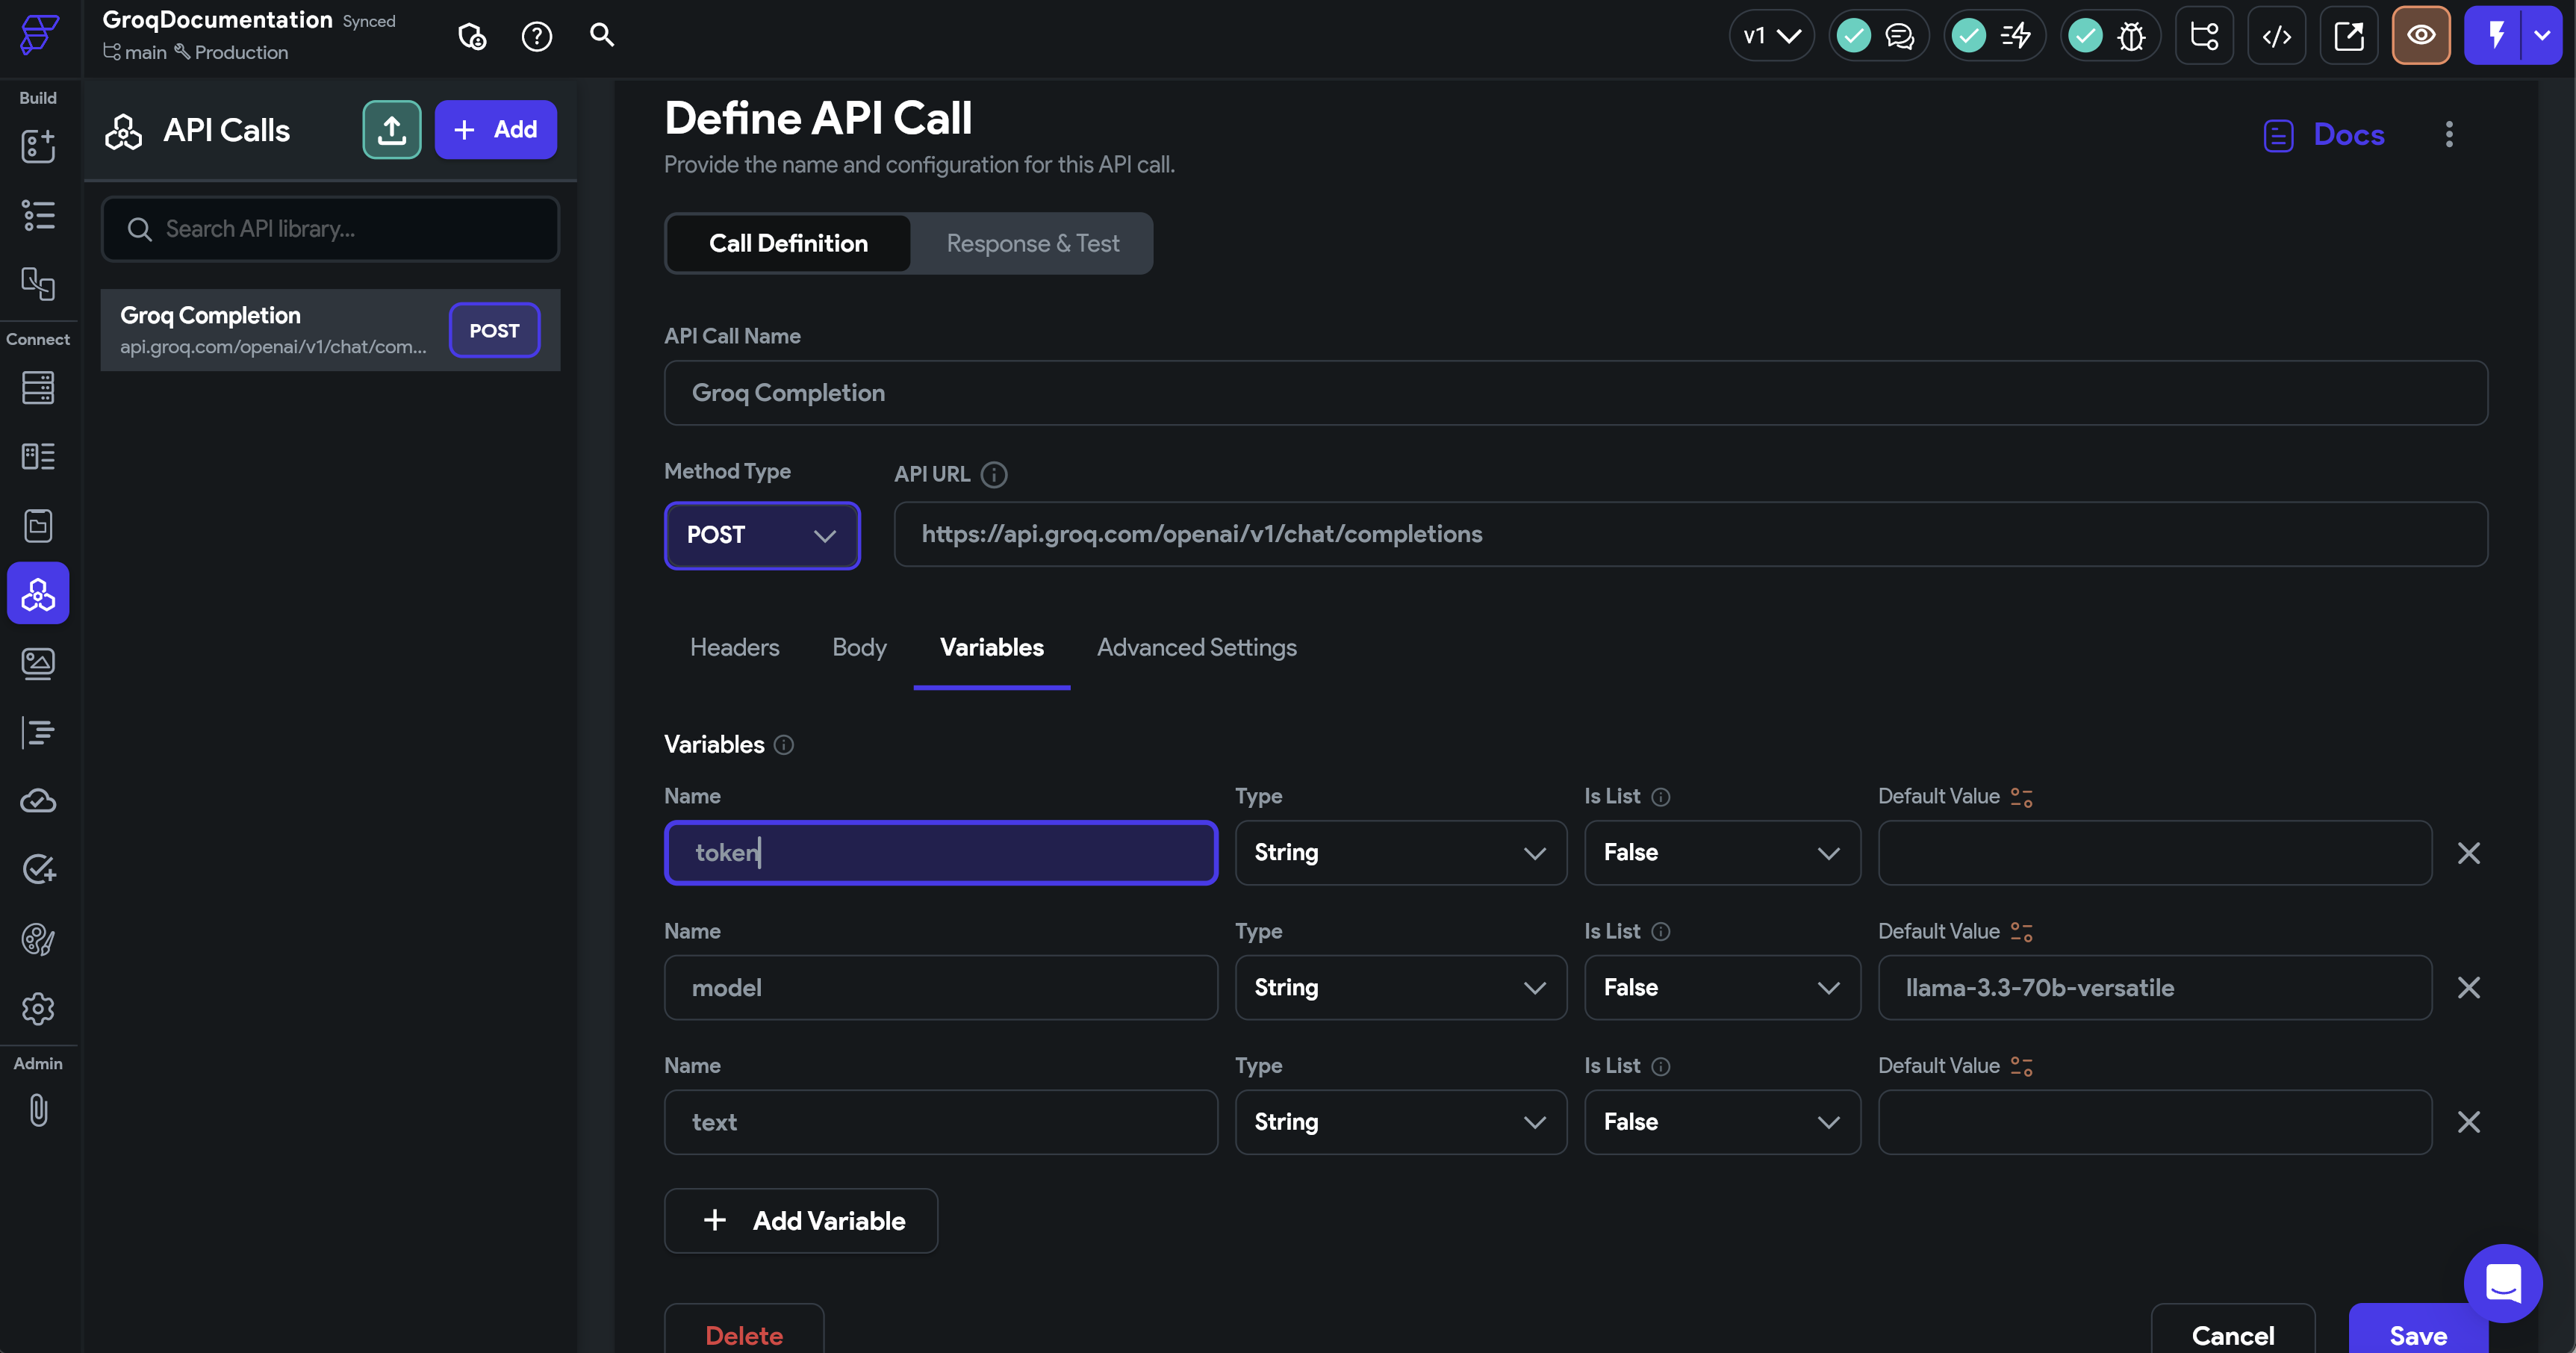
Create a new API call, call it Groq Completion, set the method type as POST, and for the API URL, use: https://api.groq.com/openai/v1/chat/completions
Now, add the following variables:
token- This is your Groq API key, which you can get from the App Values tab.model- This is the model you want to use. For this example, we'll usellama-3.3-70b-versatile.text- This is the text you want to send to the Groq API.
3. Define your API call header
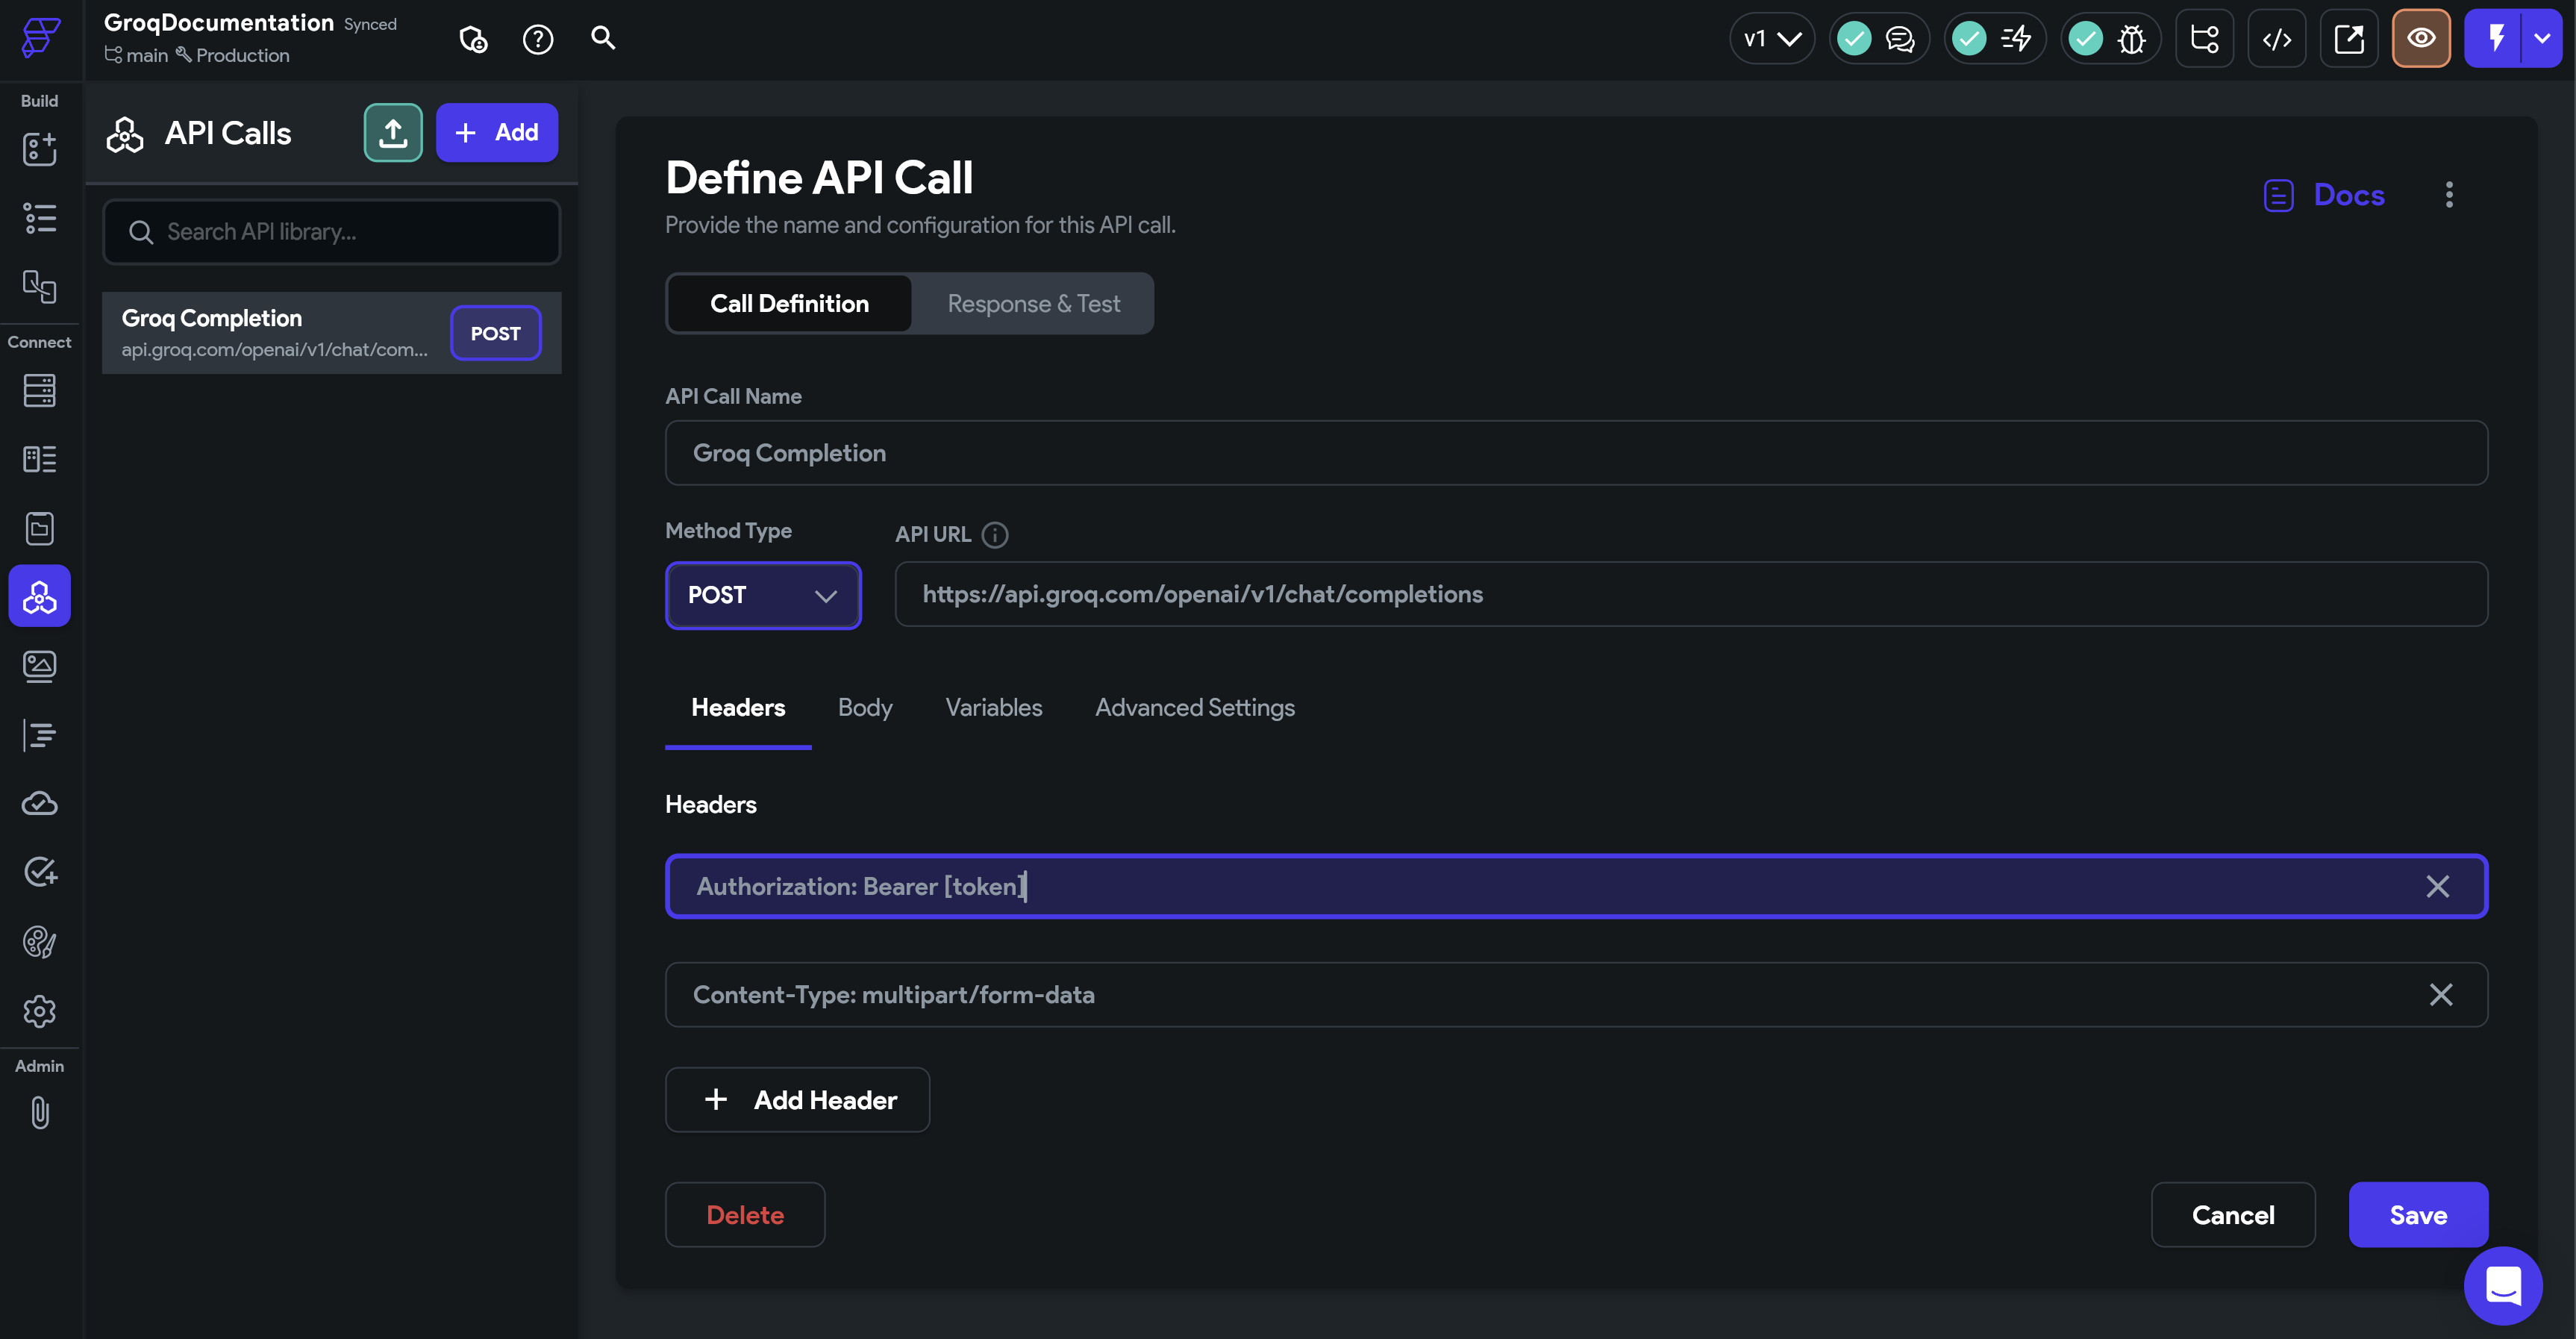
Once you have added the relevant variables, define your API call header. You can reference the token variable you defined by putting it in square brackets ([]).
Define your API call header as follows: Authorization: Bearer [token]
4. Define the body of your API call
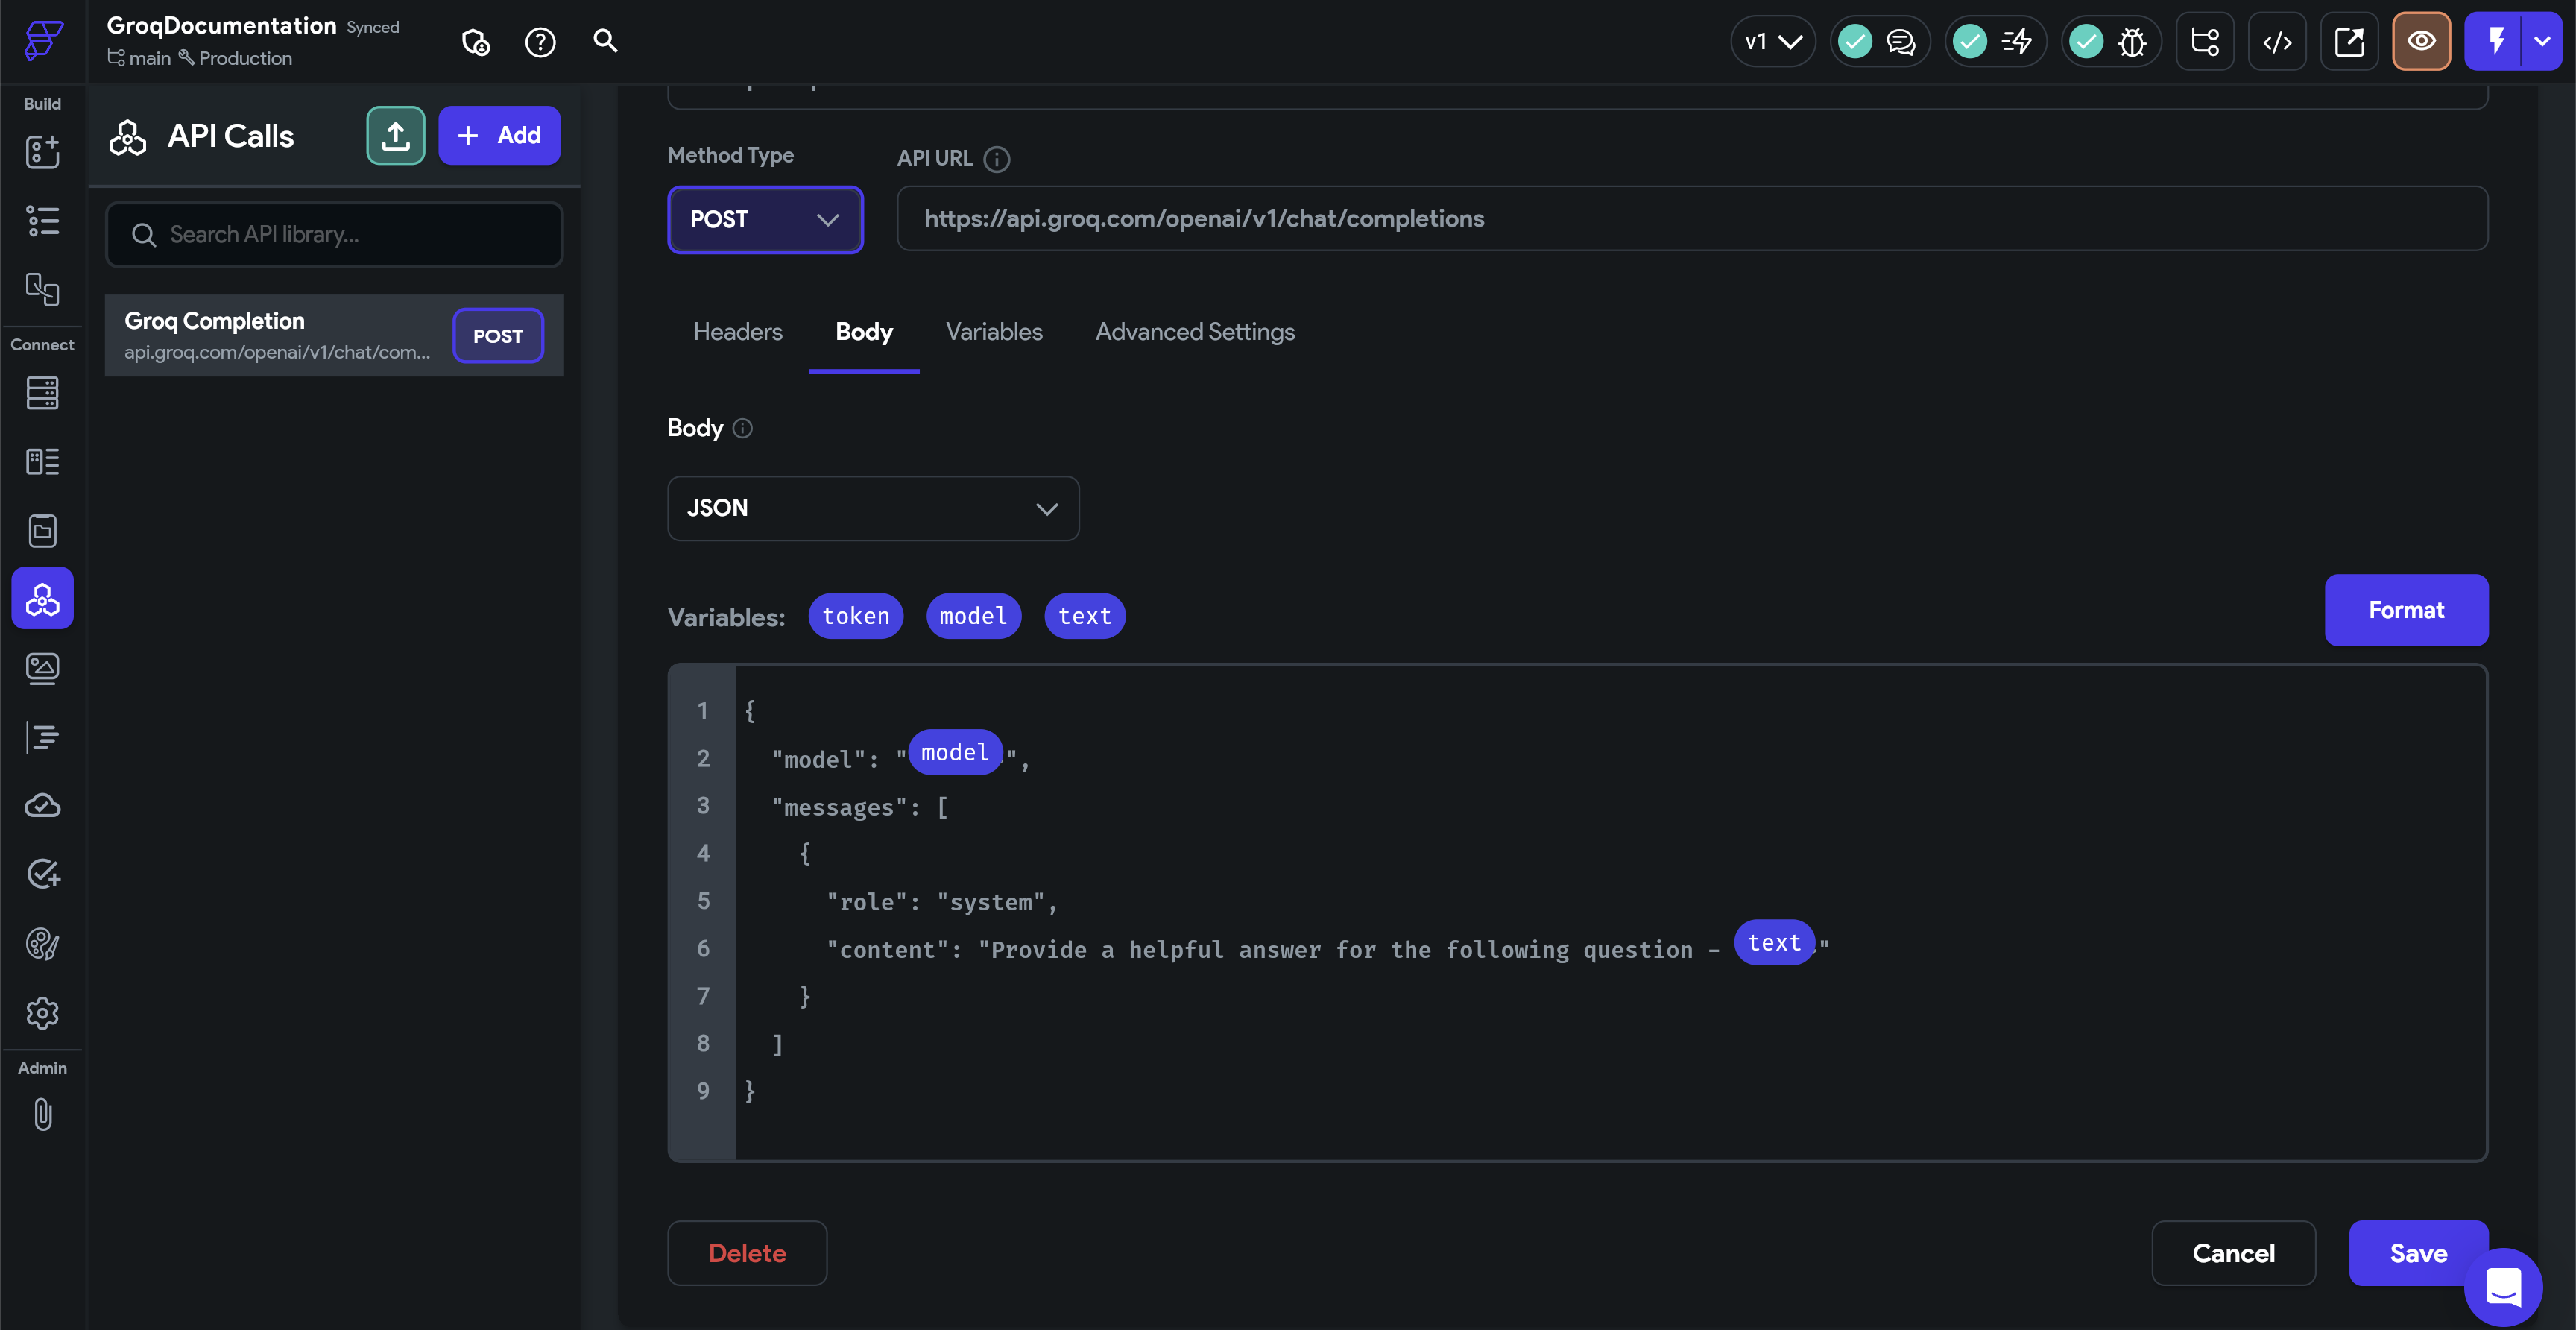
You can drag and drop your variables into the JSON body, or include them in angle brackets.
Select JSON, and add the following:
model- This is the model we defined in the variables section.messages- This is the message you want to send to the Groq API. We need to add the 'text' variable we defined in the variables section within the message within the system-message.
You can modify the system message to fit your specific use-case. We are going to use a generic system message: "Provide a helpful answer for the following question - text"
5. Test your API call
By clicking on the “Response & Test” button, you can test your API call. Provide values for your variables, and hit “Test API call” to see the response.
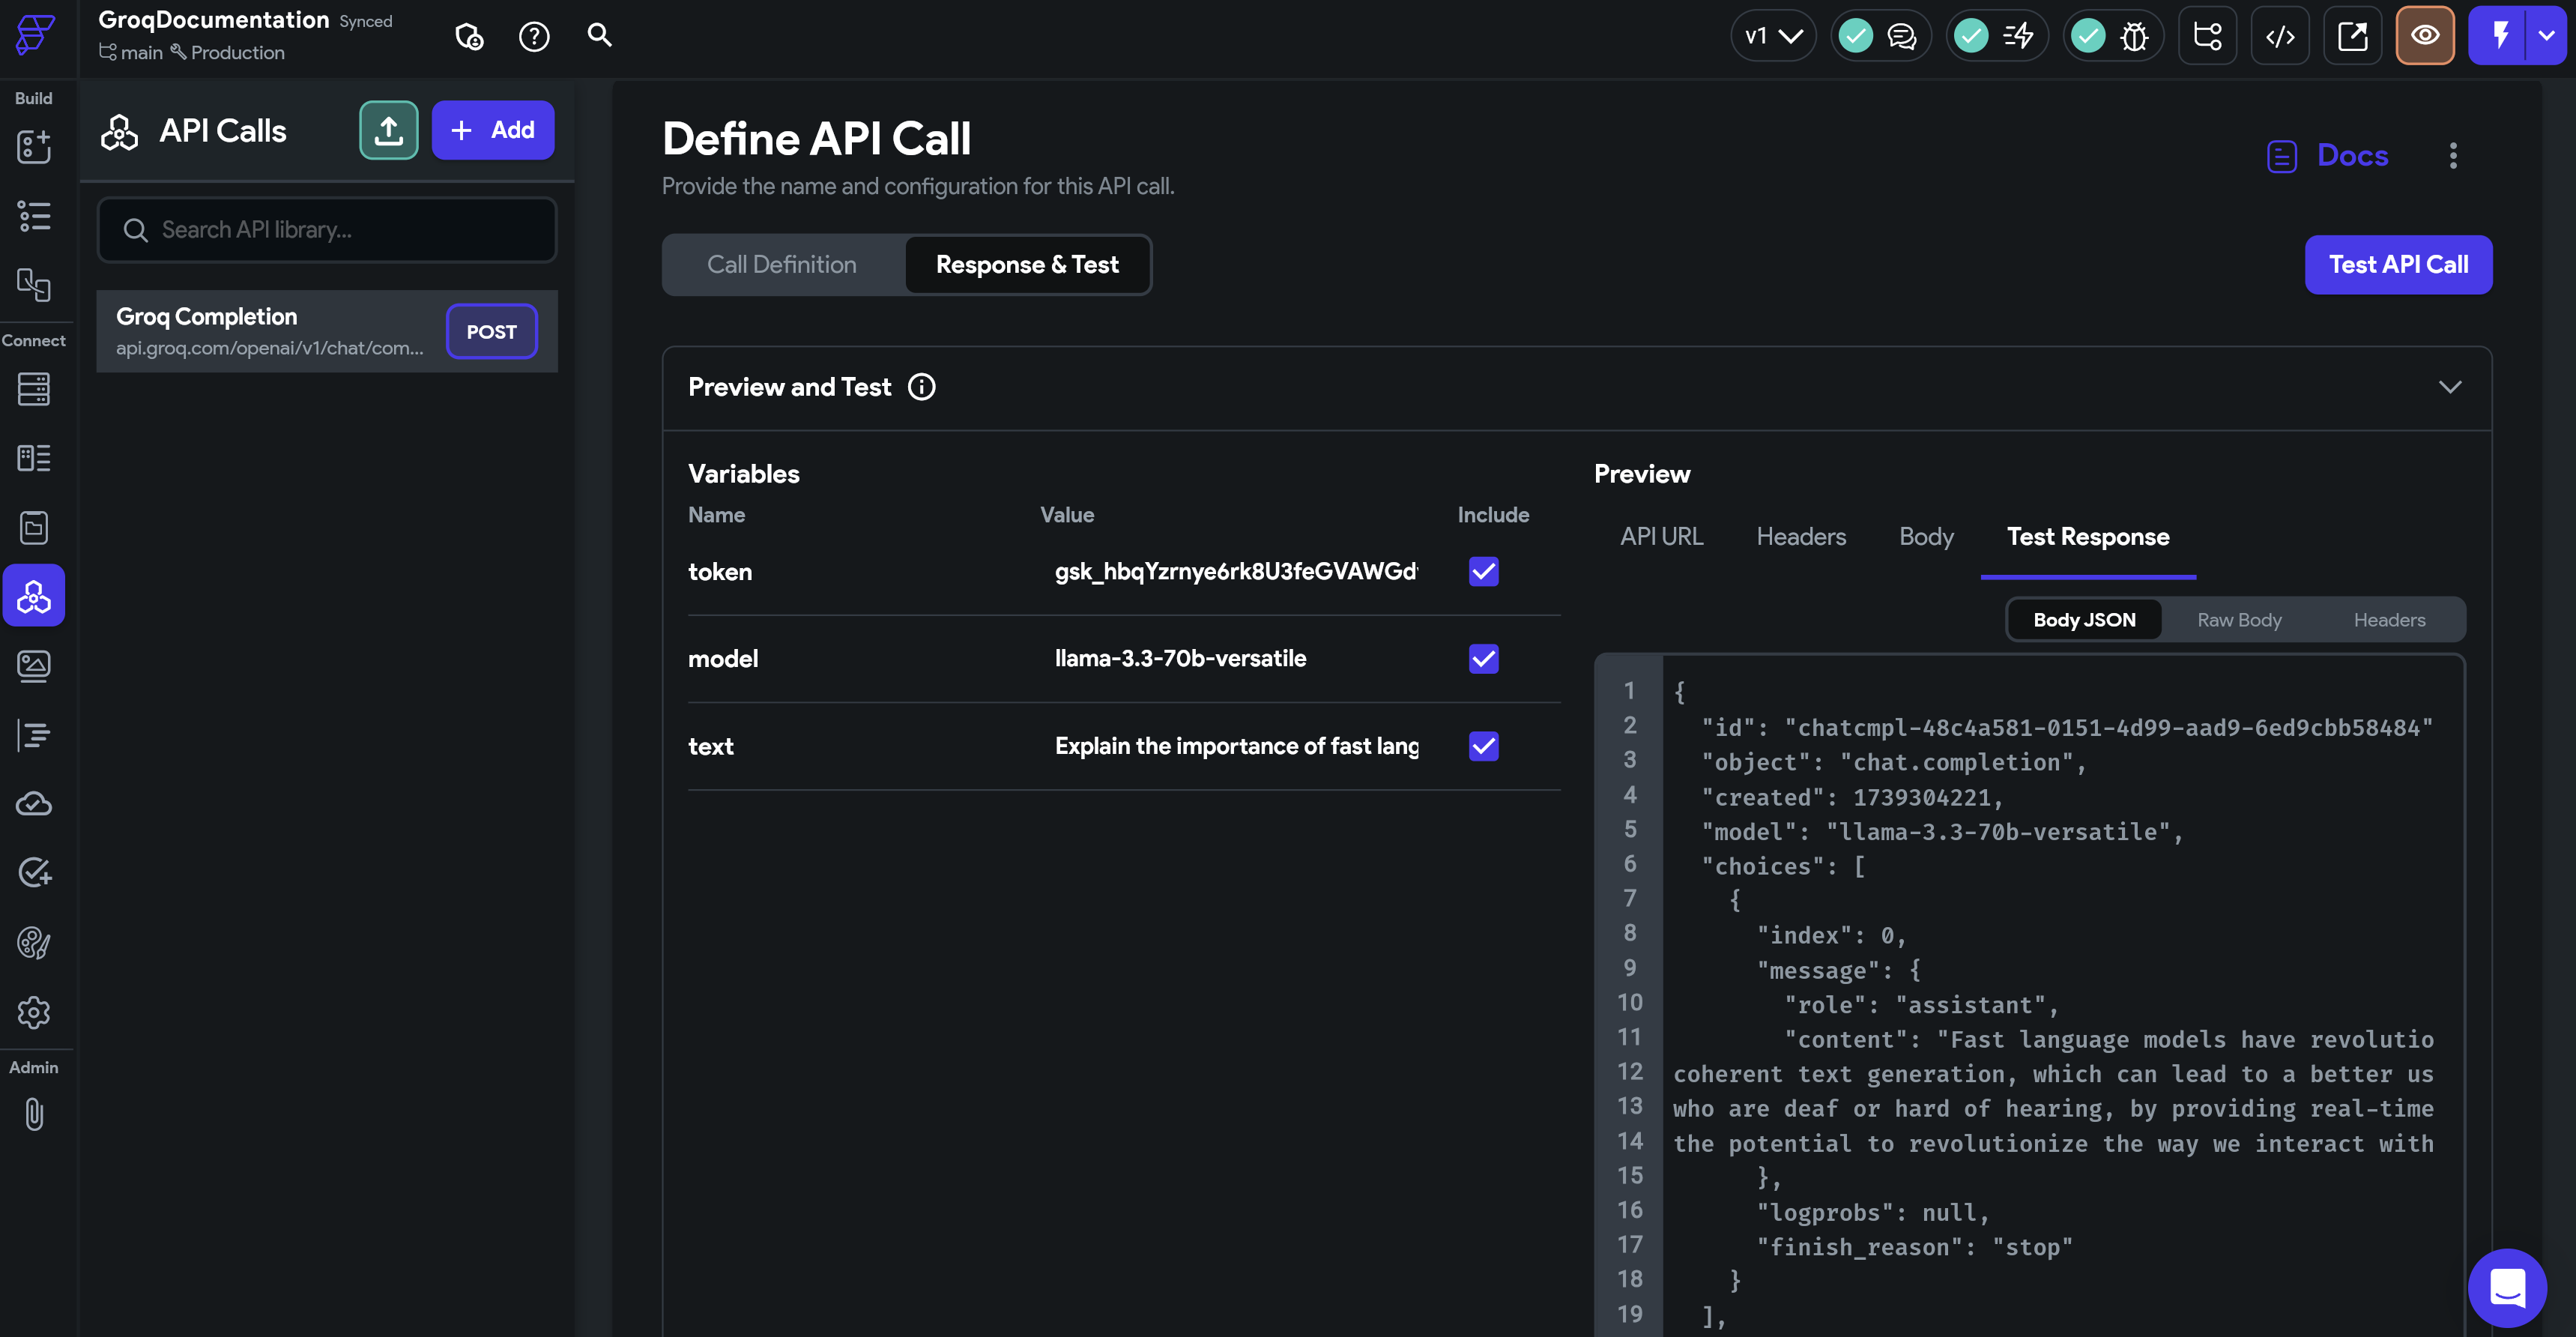
6. Save relevant JSON Paths of the response
Once you have your API response, you can save relevant JSON Paths of the response.
To save the content of the response from Groq, you can scroll down and click “Add JSON Path” for $.choices[:].message.content and provide a name for it, such as “groqResponse”
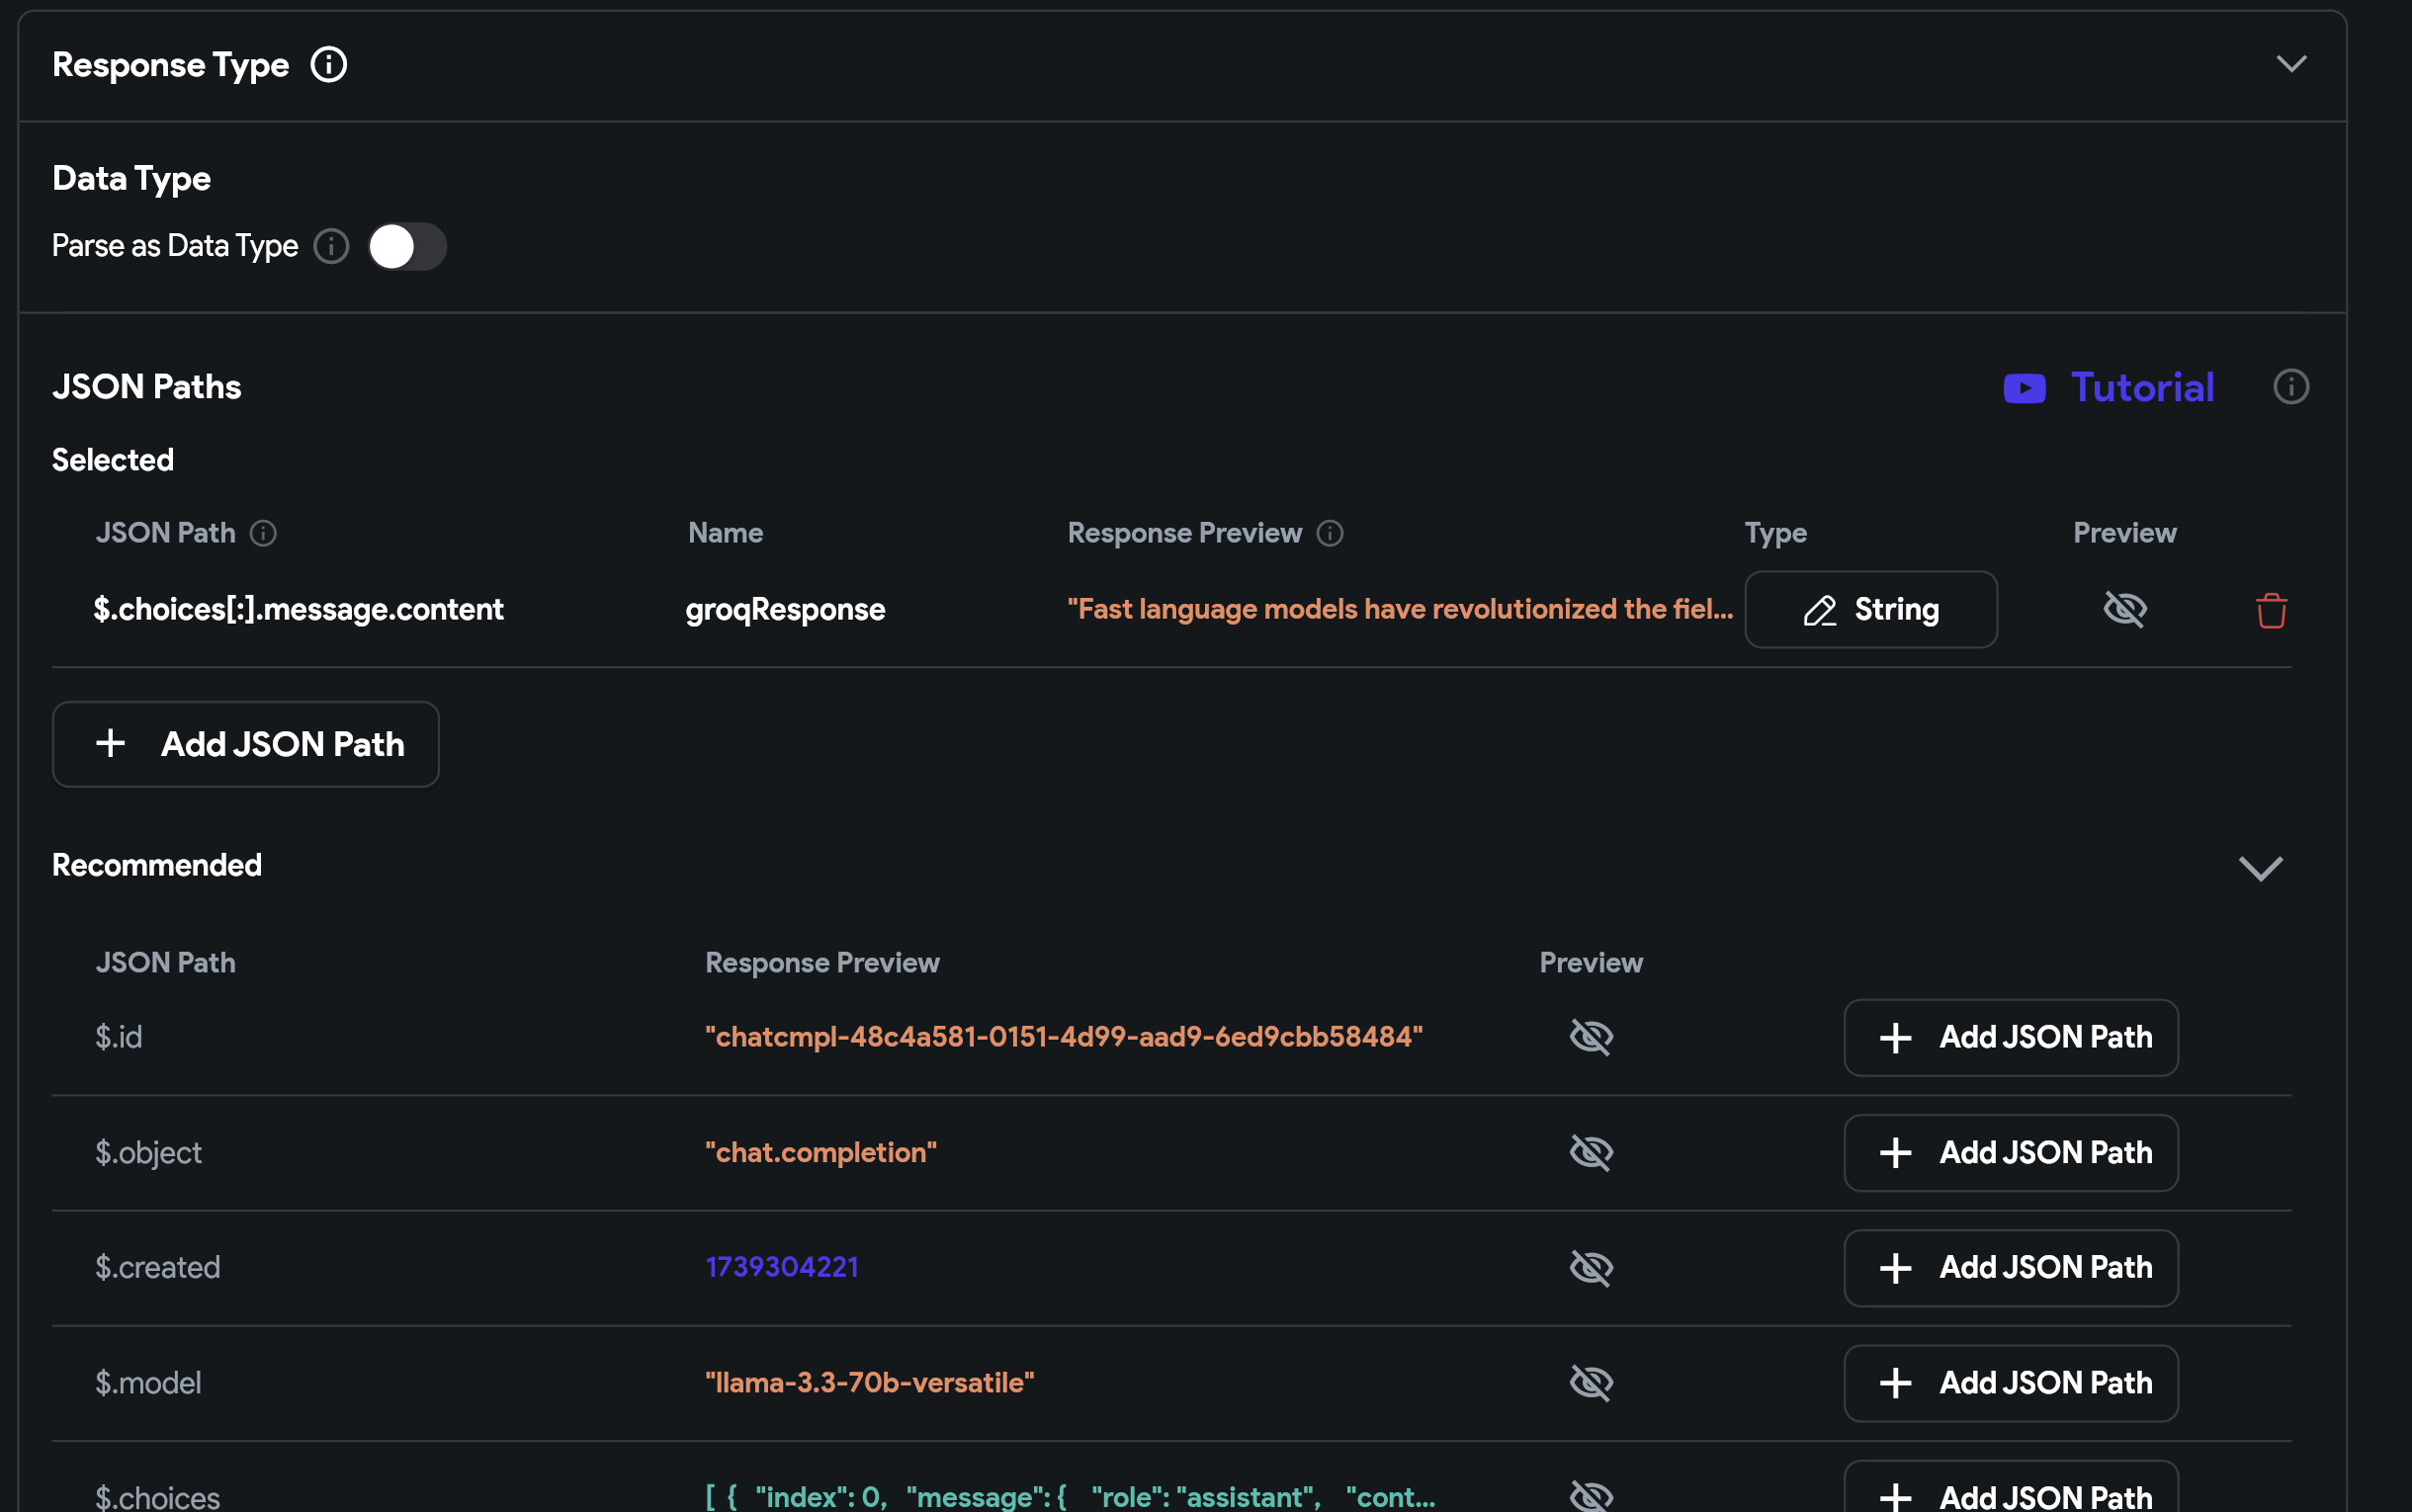
7. Connect the API call to your UI with an action
Now that you have added & tested your API call, let’s connect the API call to your UI with an action.
If you are interested in following along, you can clone the project and include your own API Key. You can also follow along with this 3-minute video.
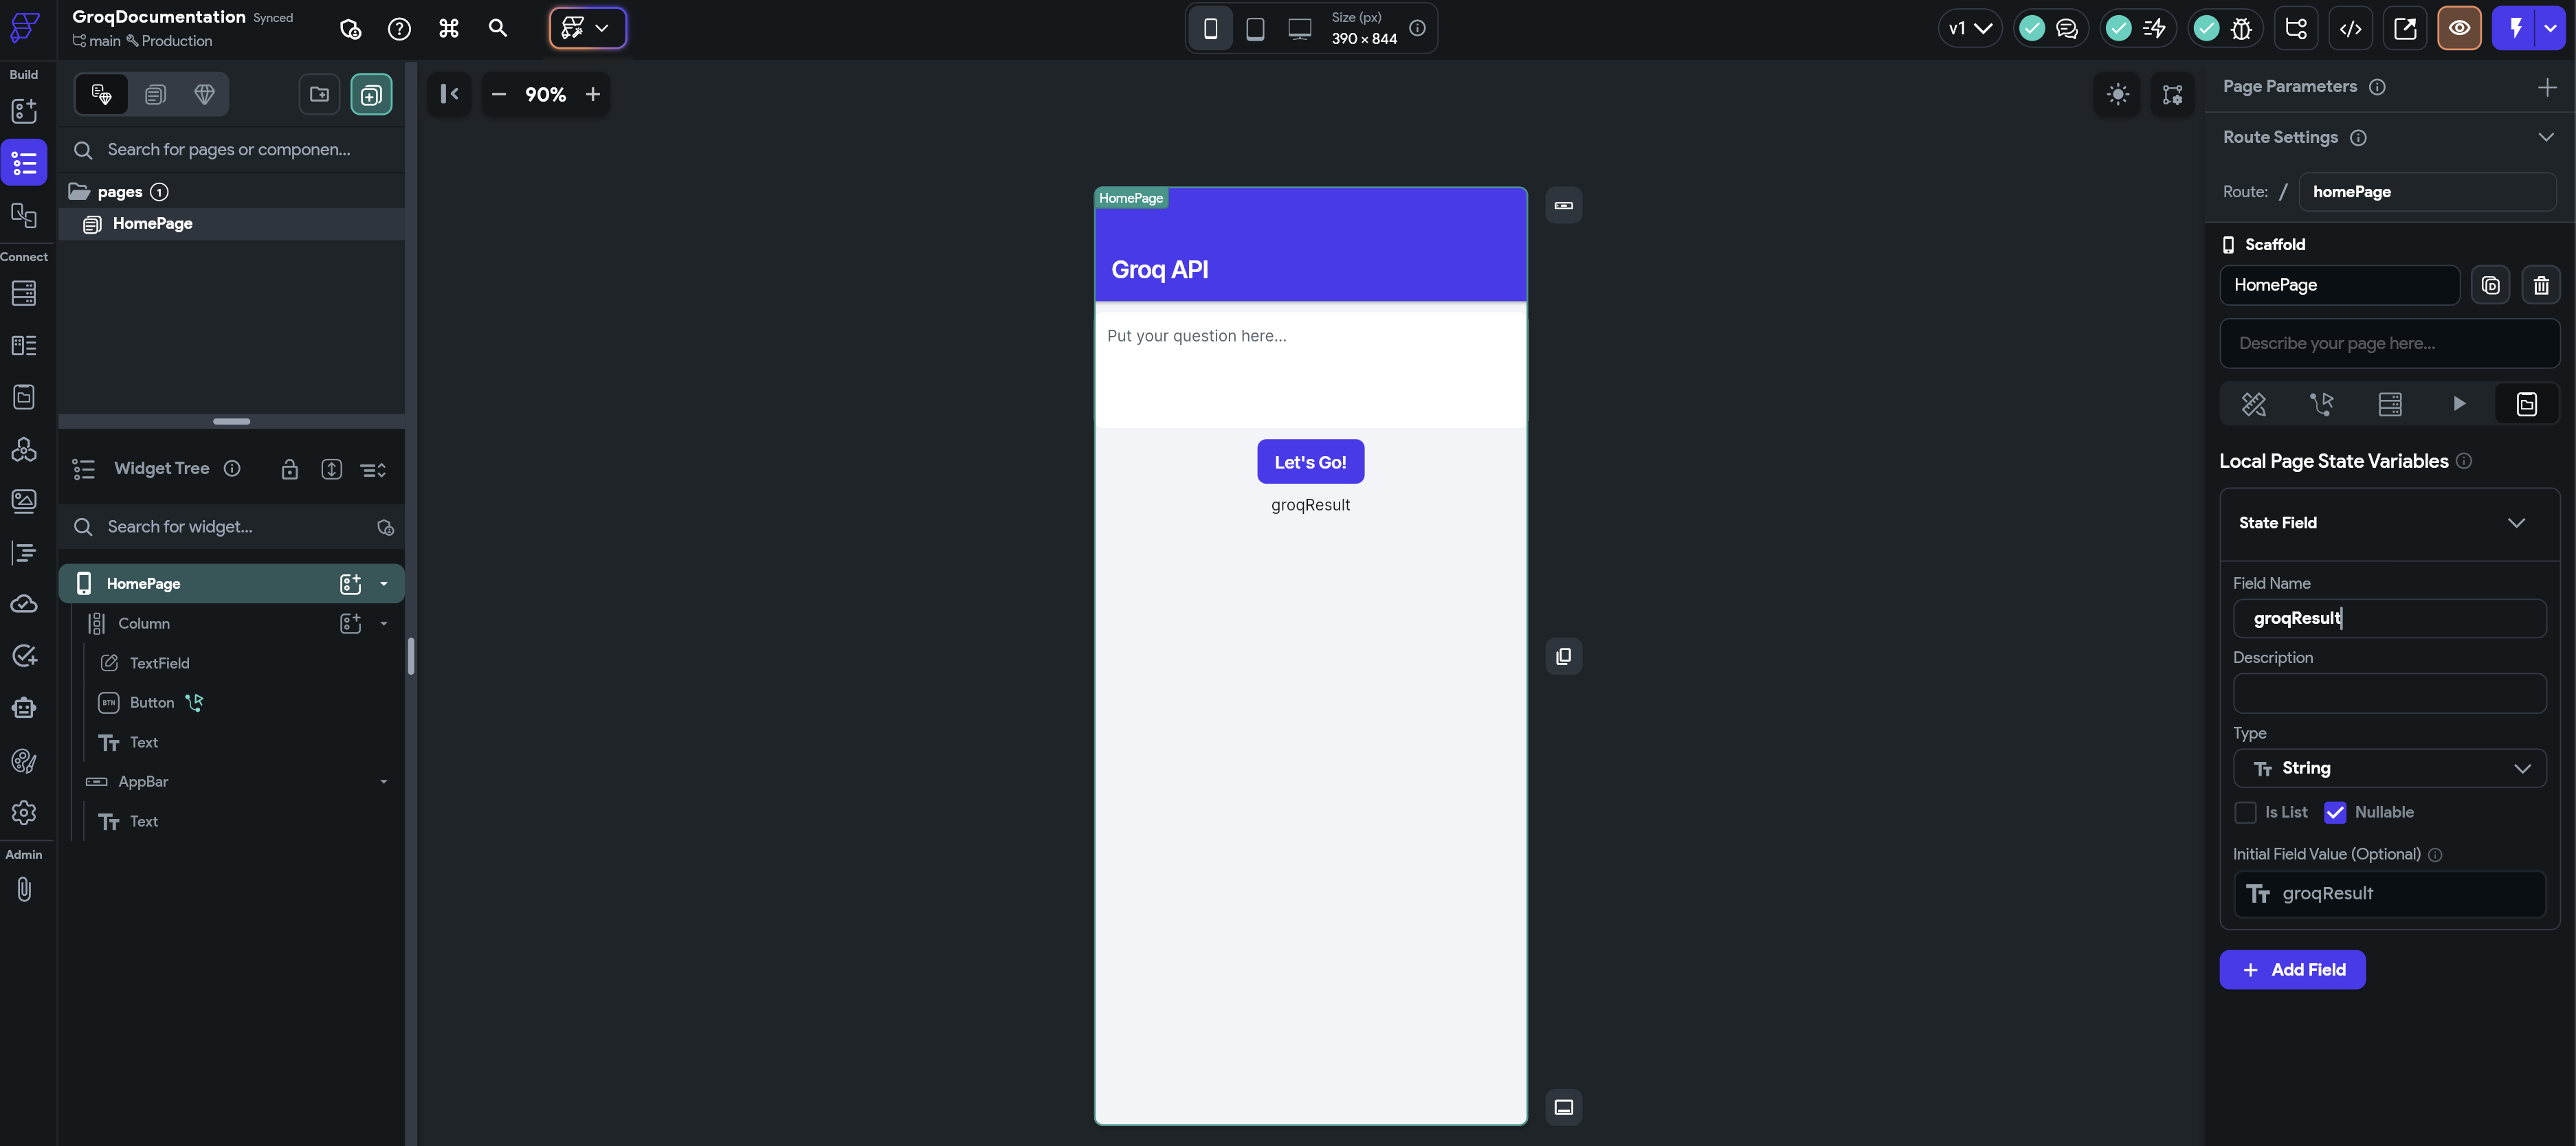
In this page, we create a simple UI that includes a TextField for a user to input their question, a button to trigger our Groq Completion API call, and a Text widget to display the result from the API. We define a page state variable, groqResult, which will be updated to the result from the API. We then bind the Text widget to our page state variable groqResult, as shown below.
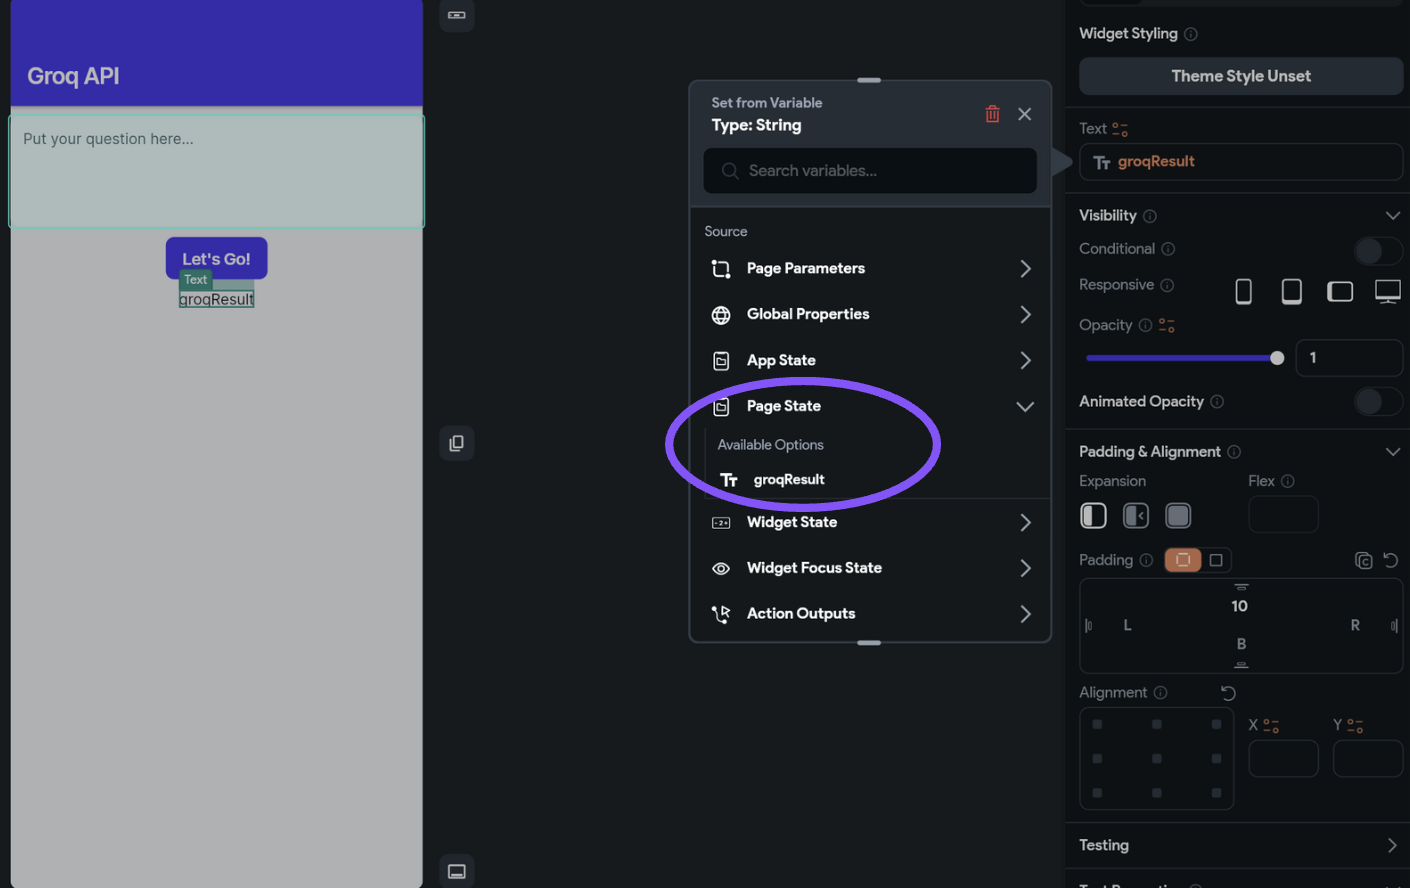
8. Define an action that calls our API
Now that we have created our UI, we can add an action to our button that will call the API, and update our Text with the API’s response. To do this, click on the button, open the action editor, and add an action to call the Groq Completion API.
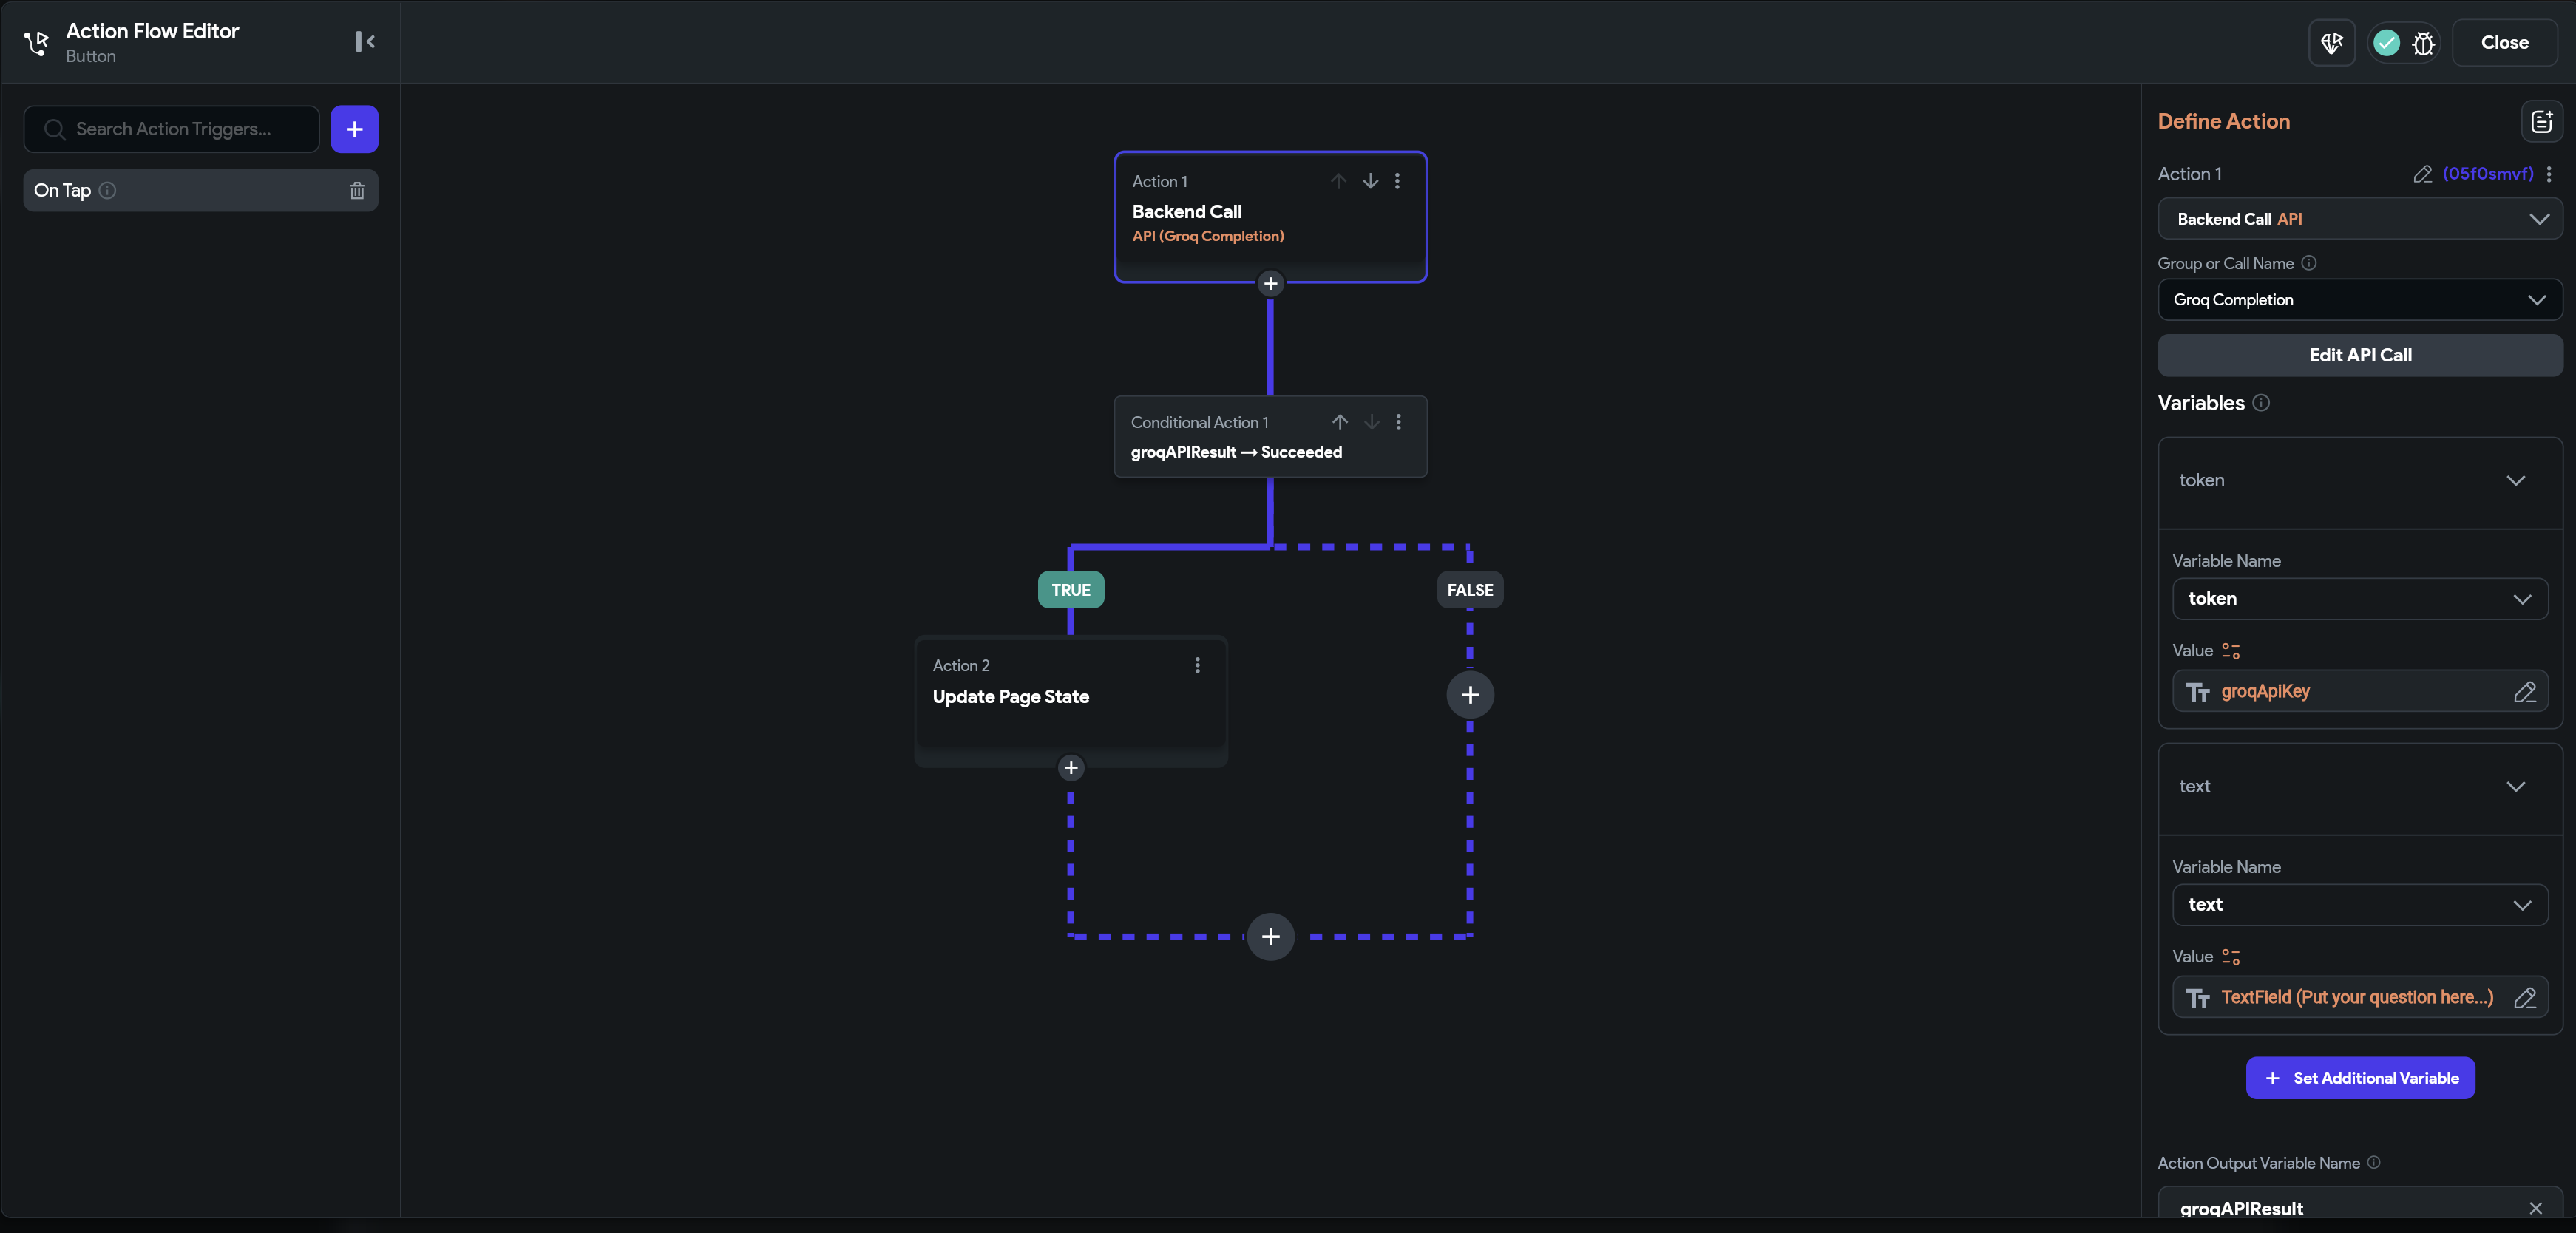
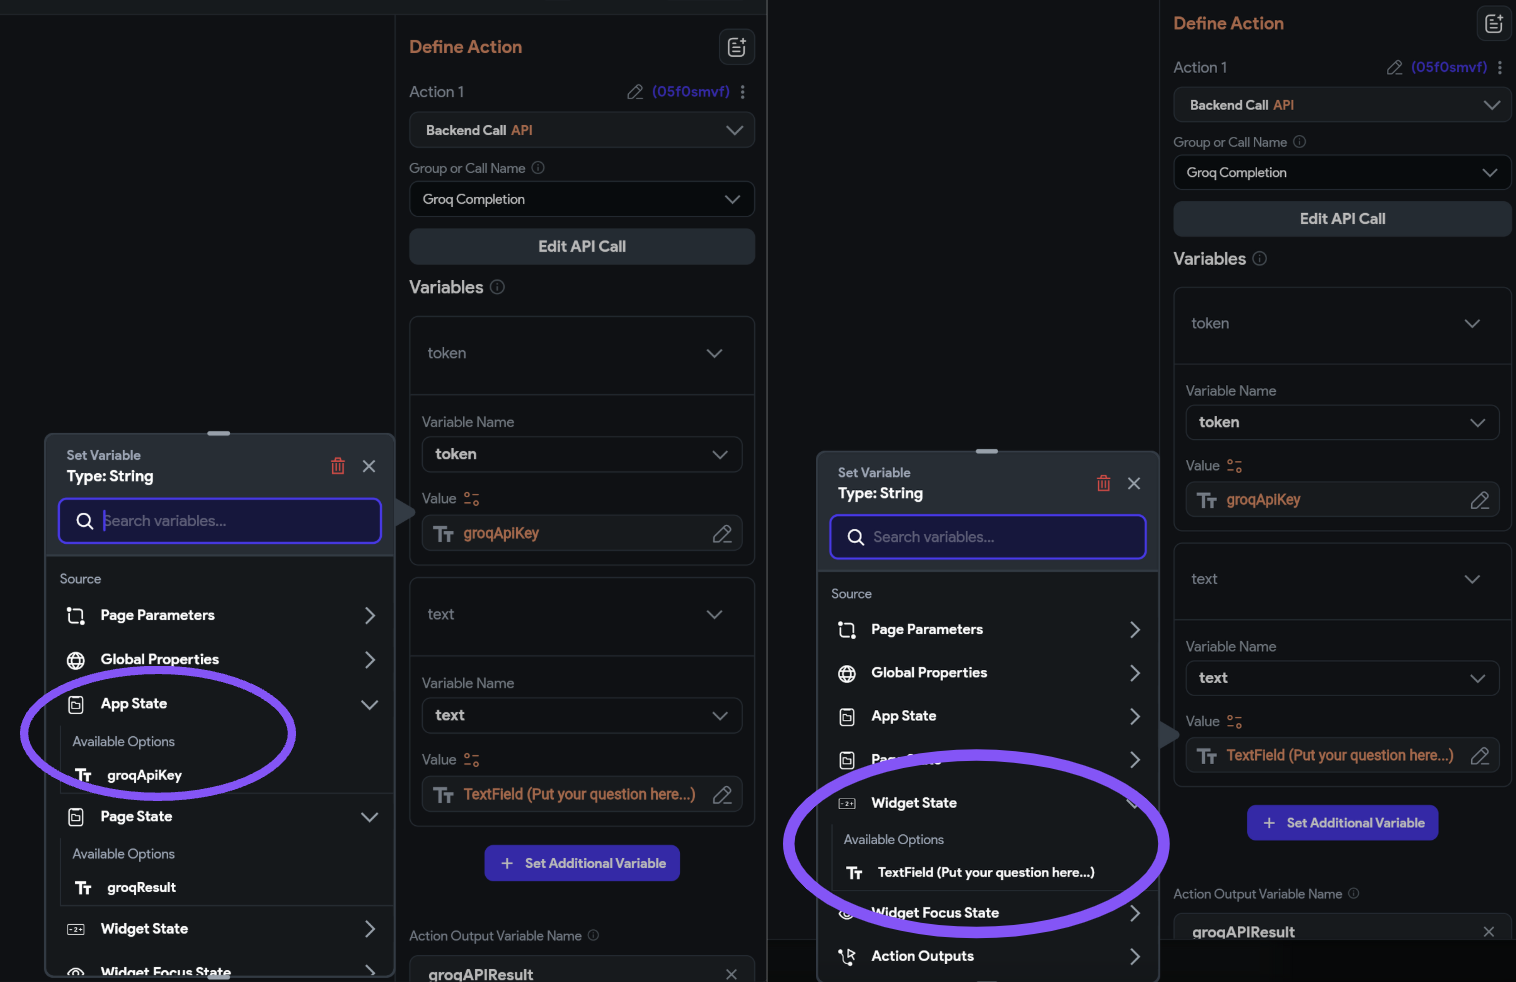
To create our first action to the Groq endpoint, create an action of type Backend API call, and set the "group or call name" to Groq Completion.
Then add two additional variables:
token- This is your Groq API key, which you can get from the App State tab.text- This is the text you want to send to the Groq API, which you can get from the TextField widget.
Finally, rename the action output to groqResponse.
9. Update the page state variable
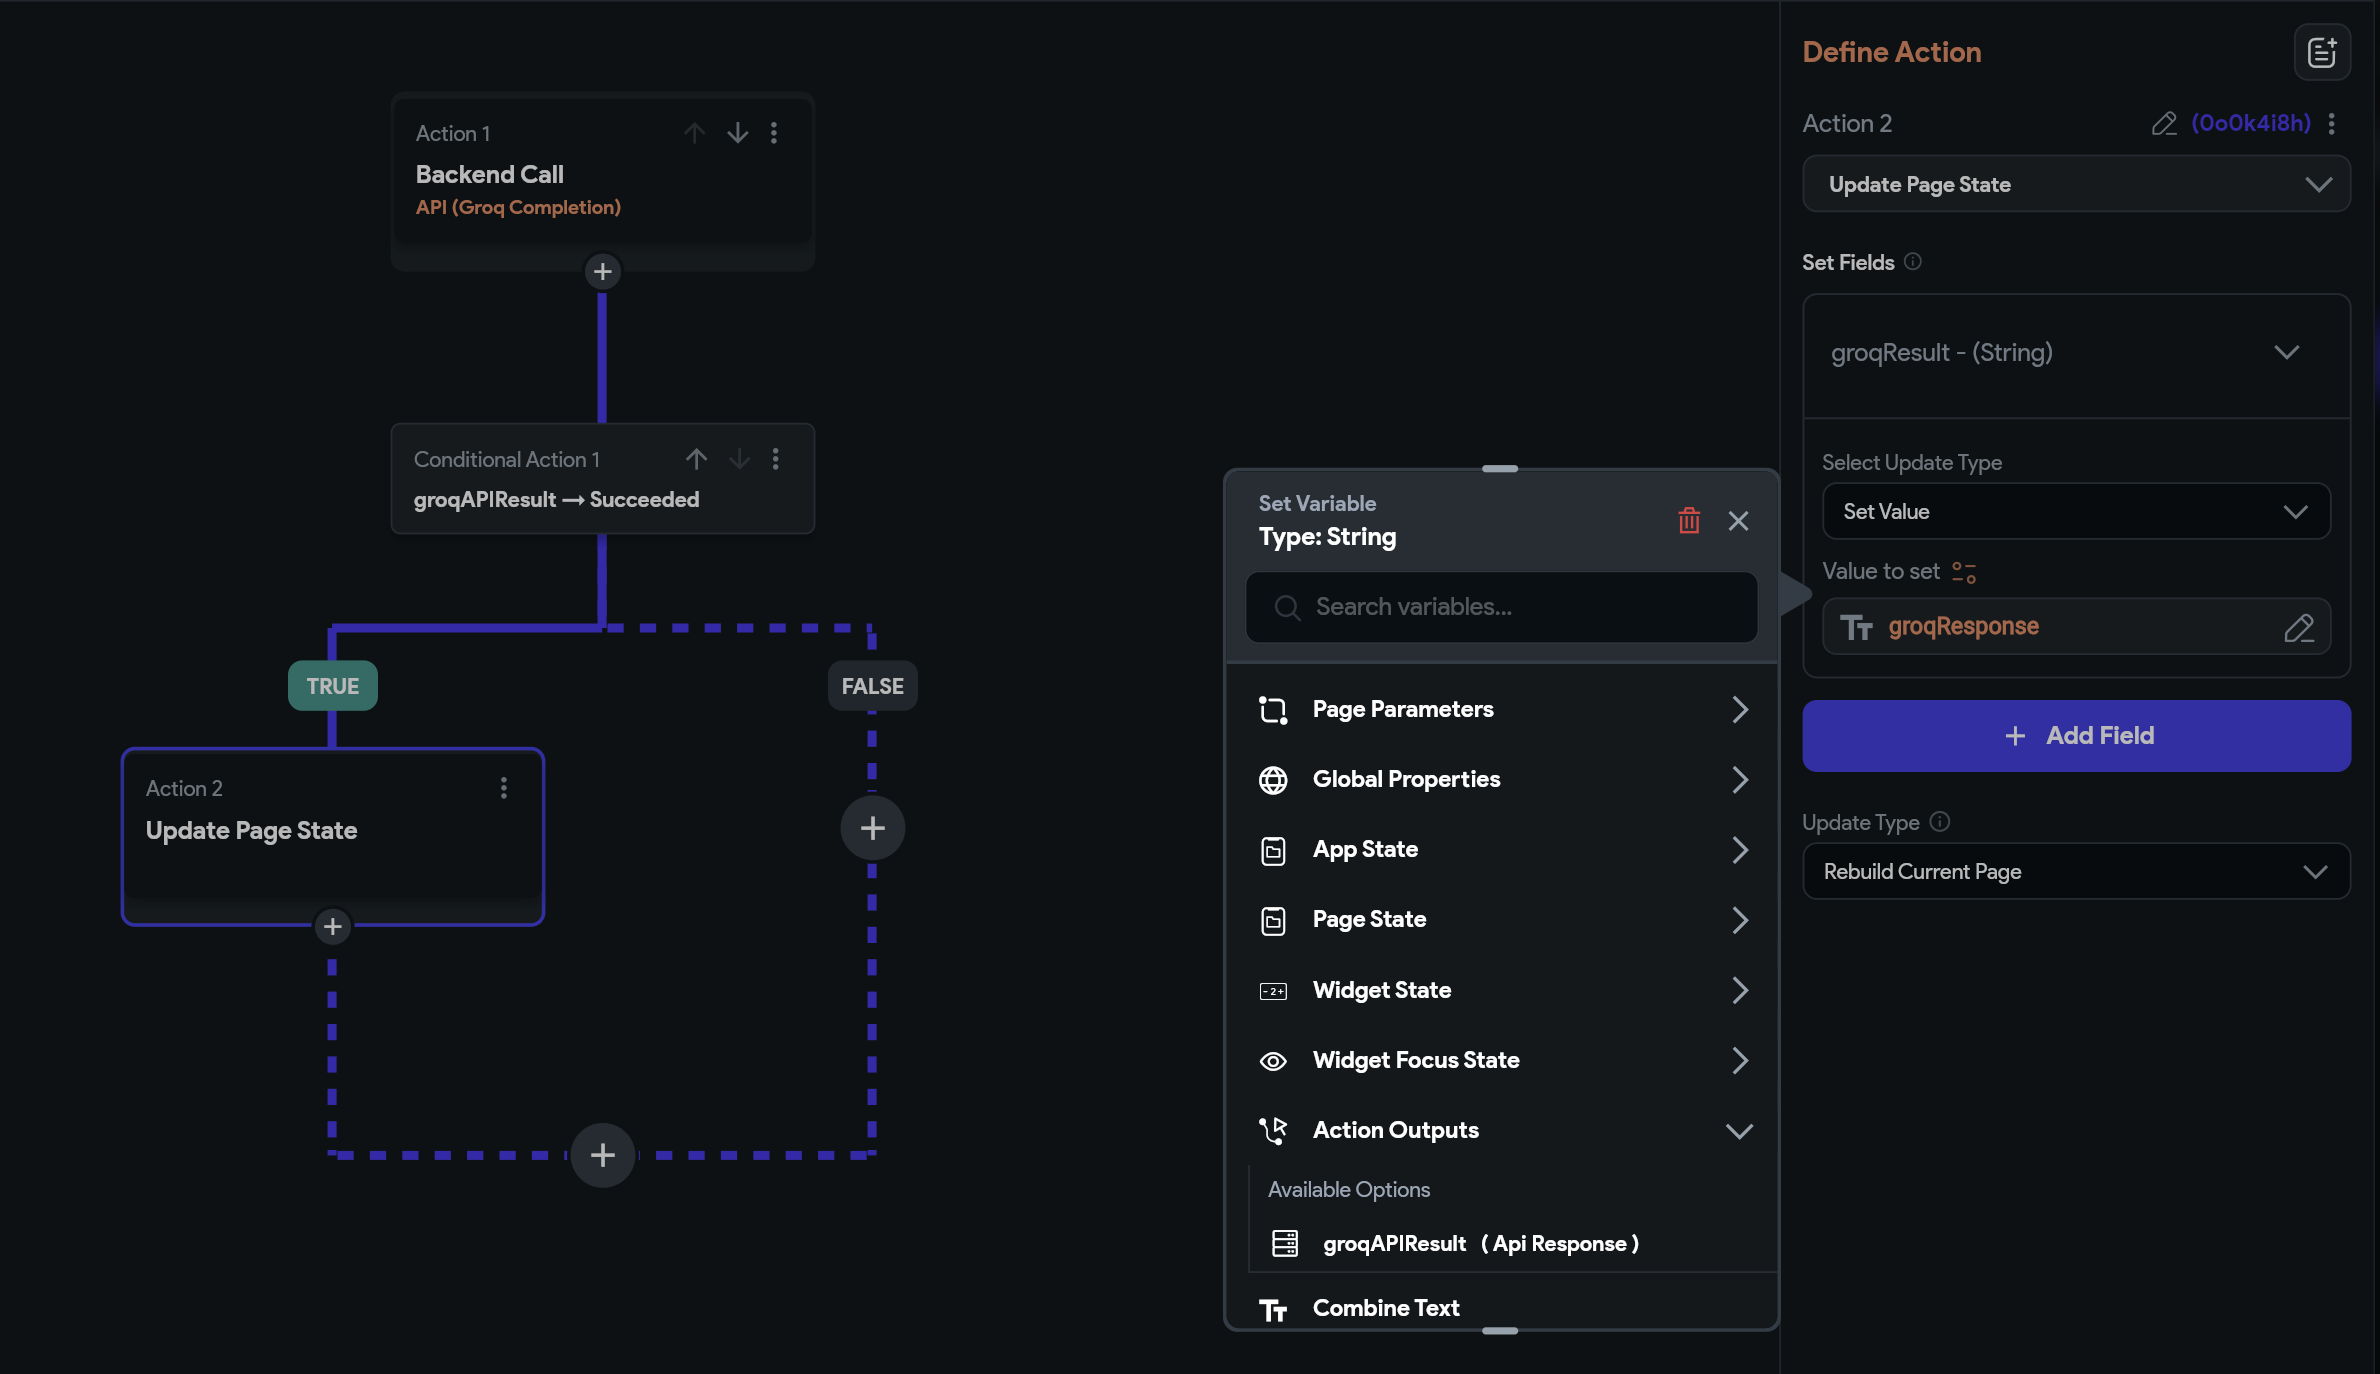
Once the API call succeeds, we can update our page state variable groqResult to the contents of the API response from Groq, using the JSON path we created when defining the API call.
Click on the "+" button for True, and add an action of type "Update Page State".
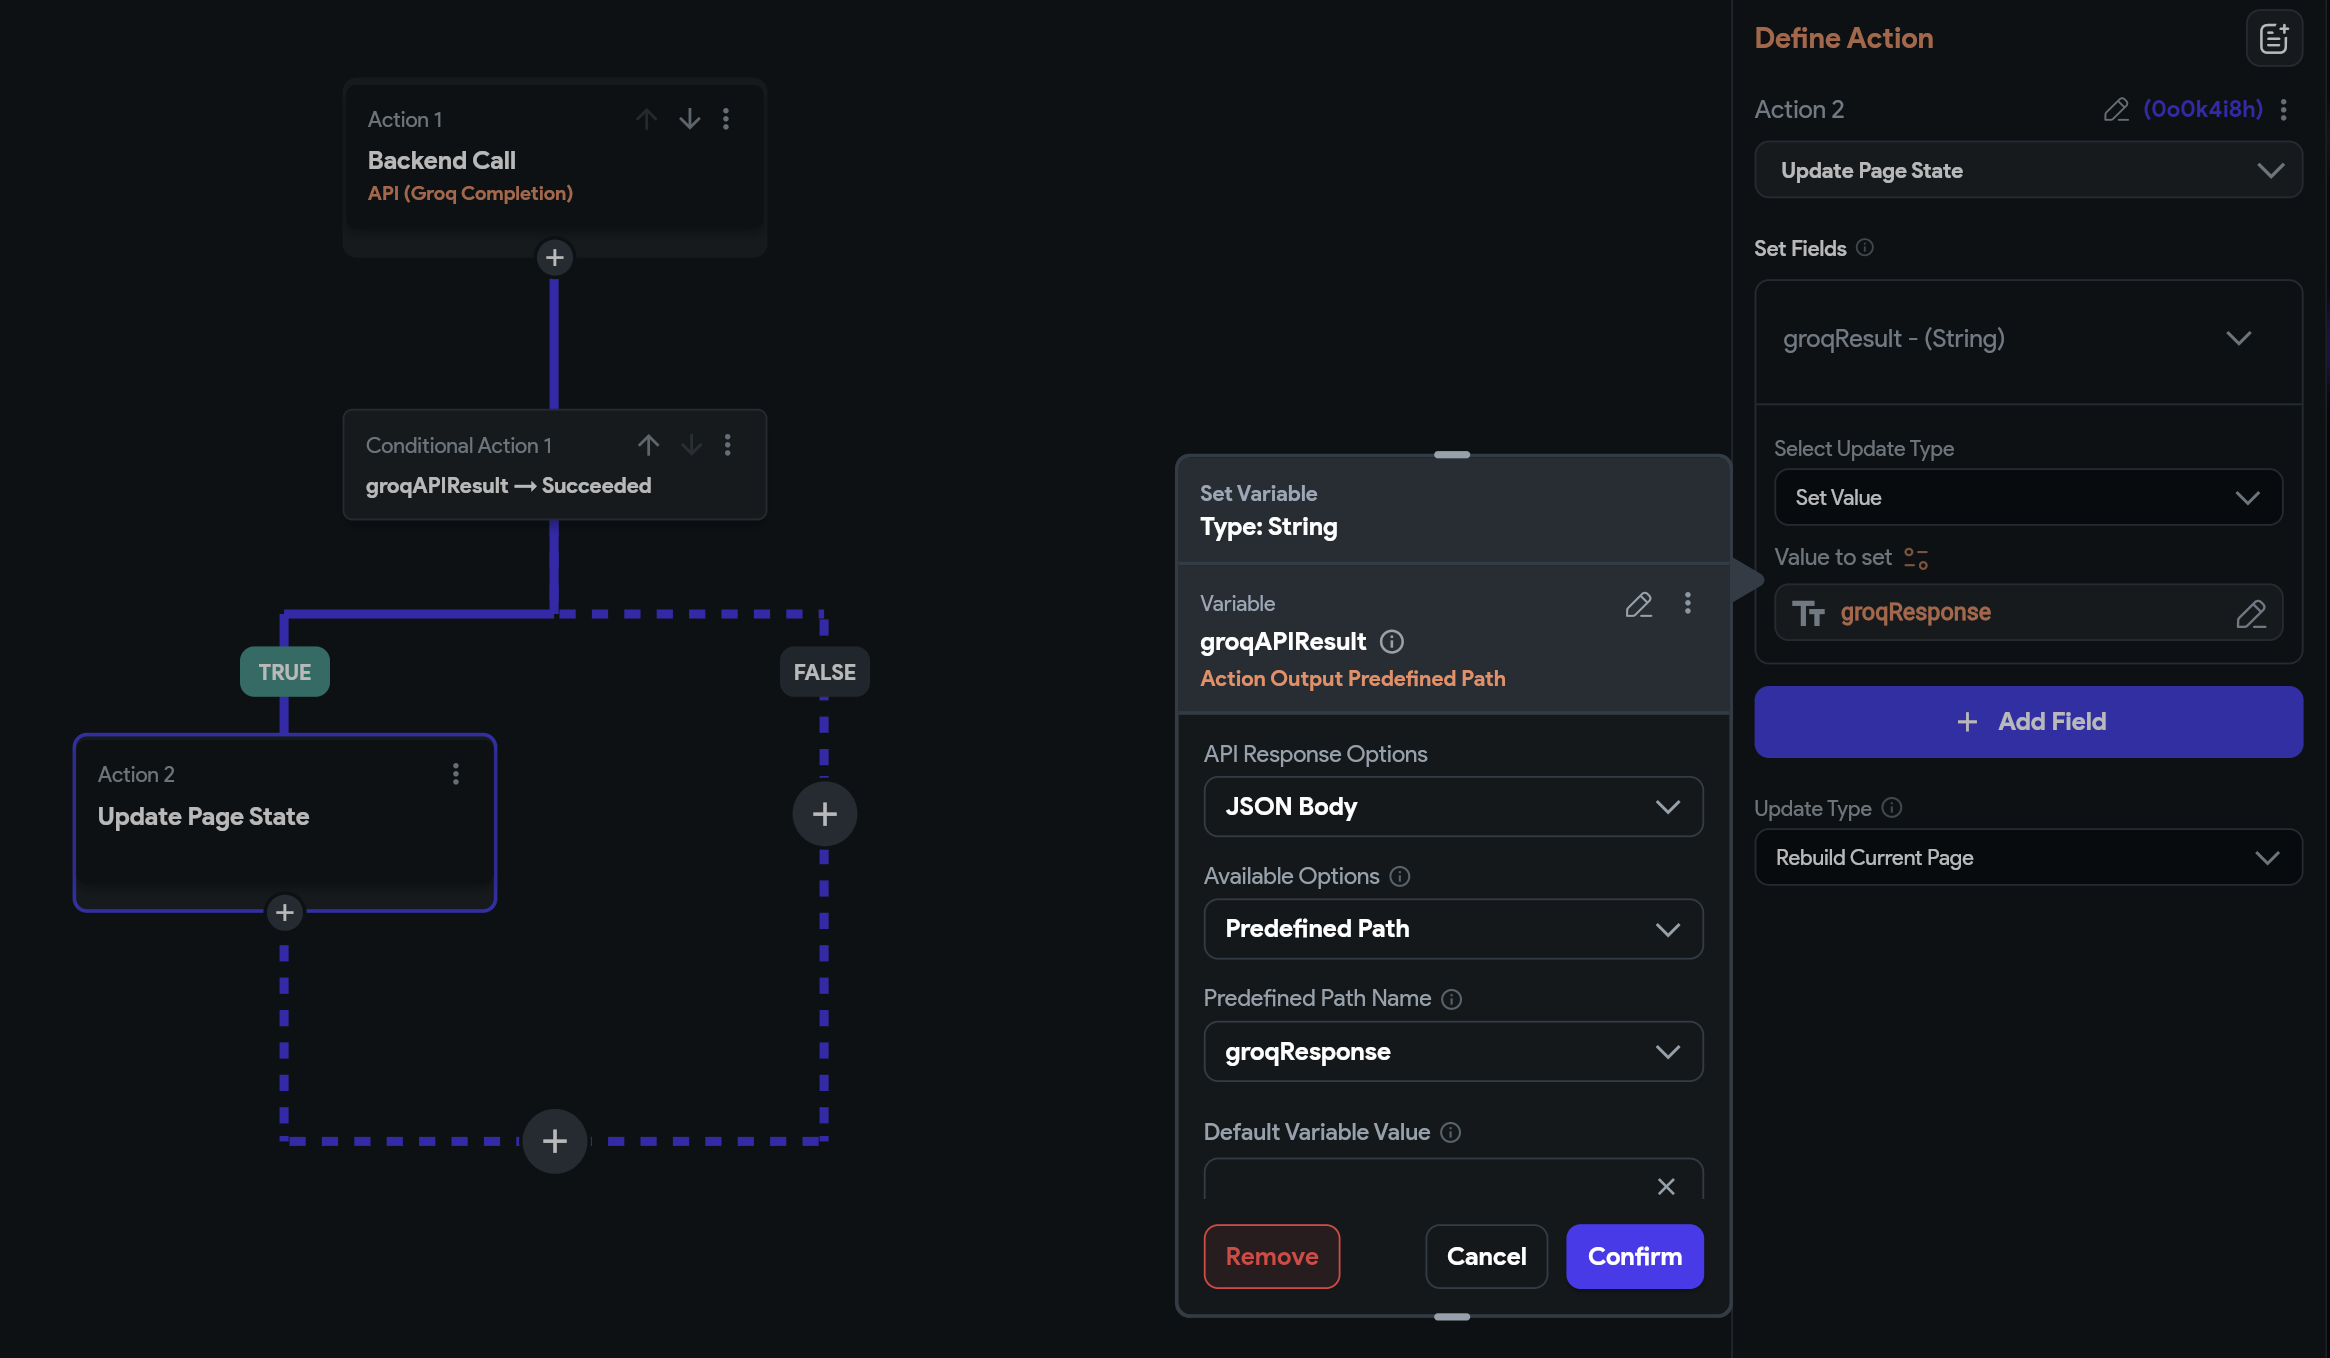
Add a field for groqResult, and set the value to groqResponse, found under Action Output.
Select JSON Body for the API Response Options, Predifined Path Path for the Available Options, and groqResponse for the Path.
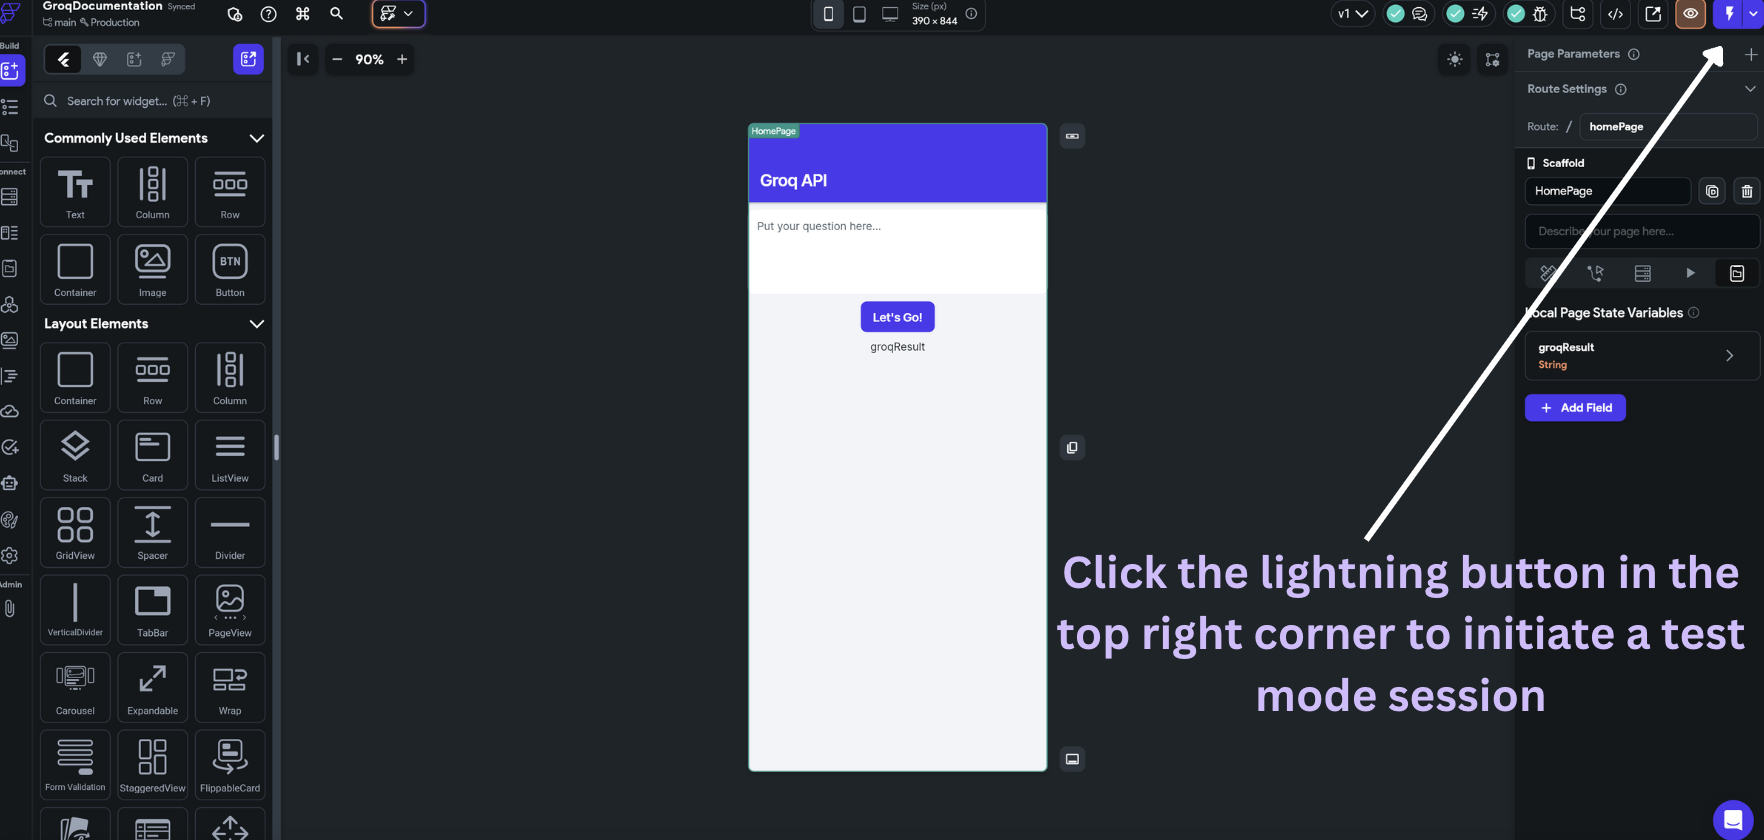
10. Run your app in test mode
Now that we have connected our API call to the UI as an action, we can run our app in test mode.
Watch a video of the app live in test mode.
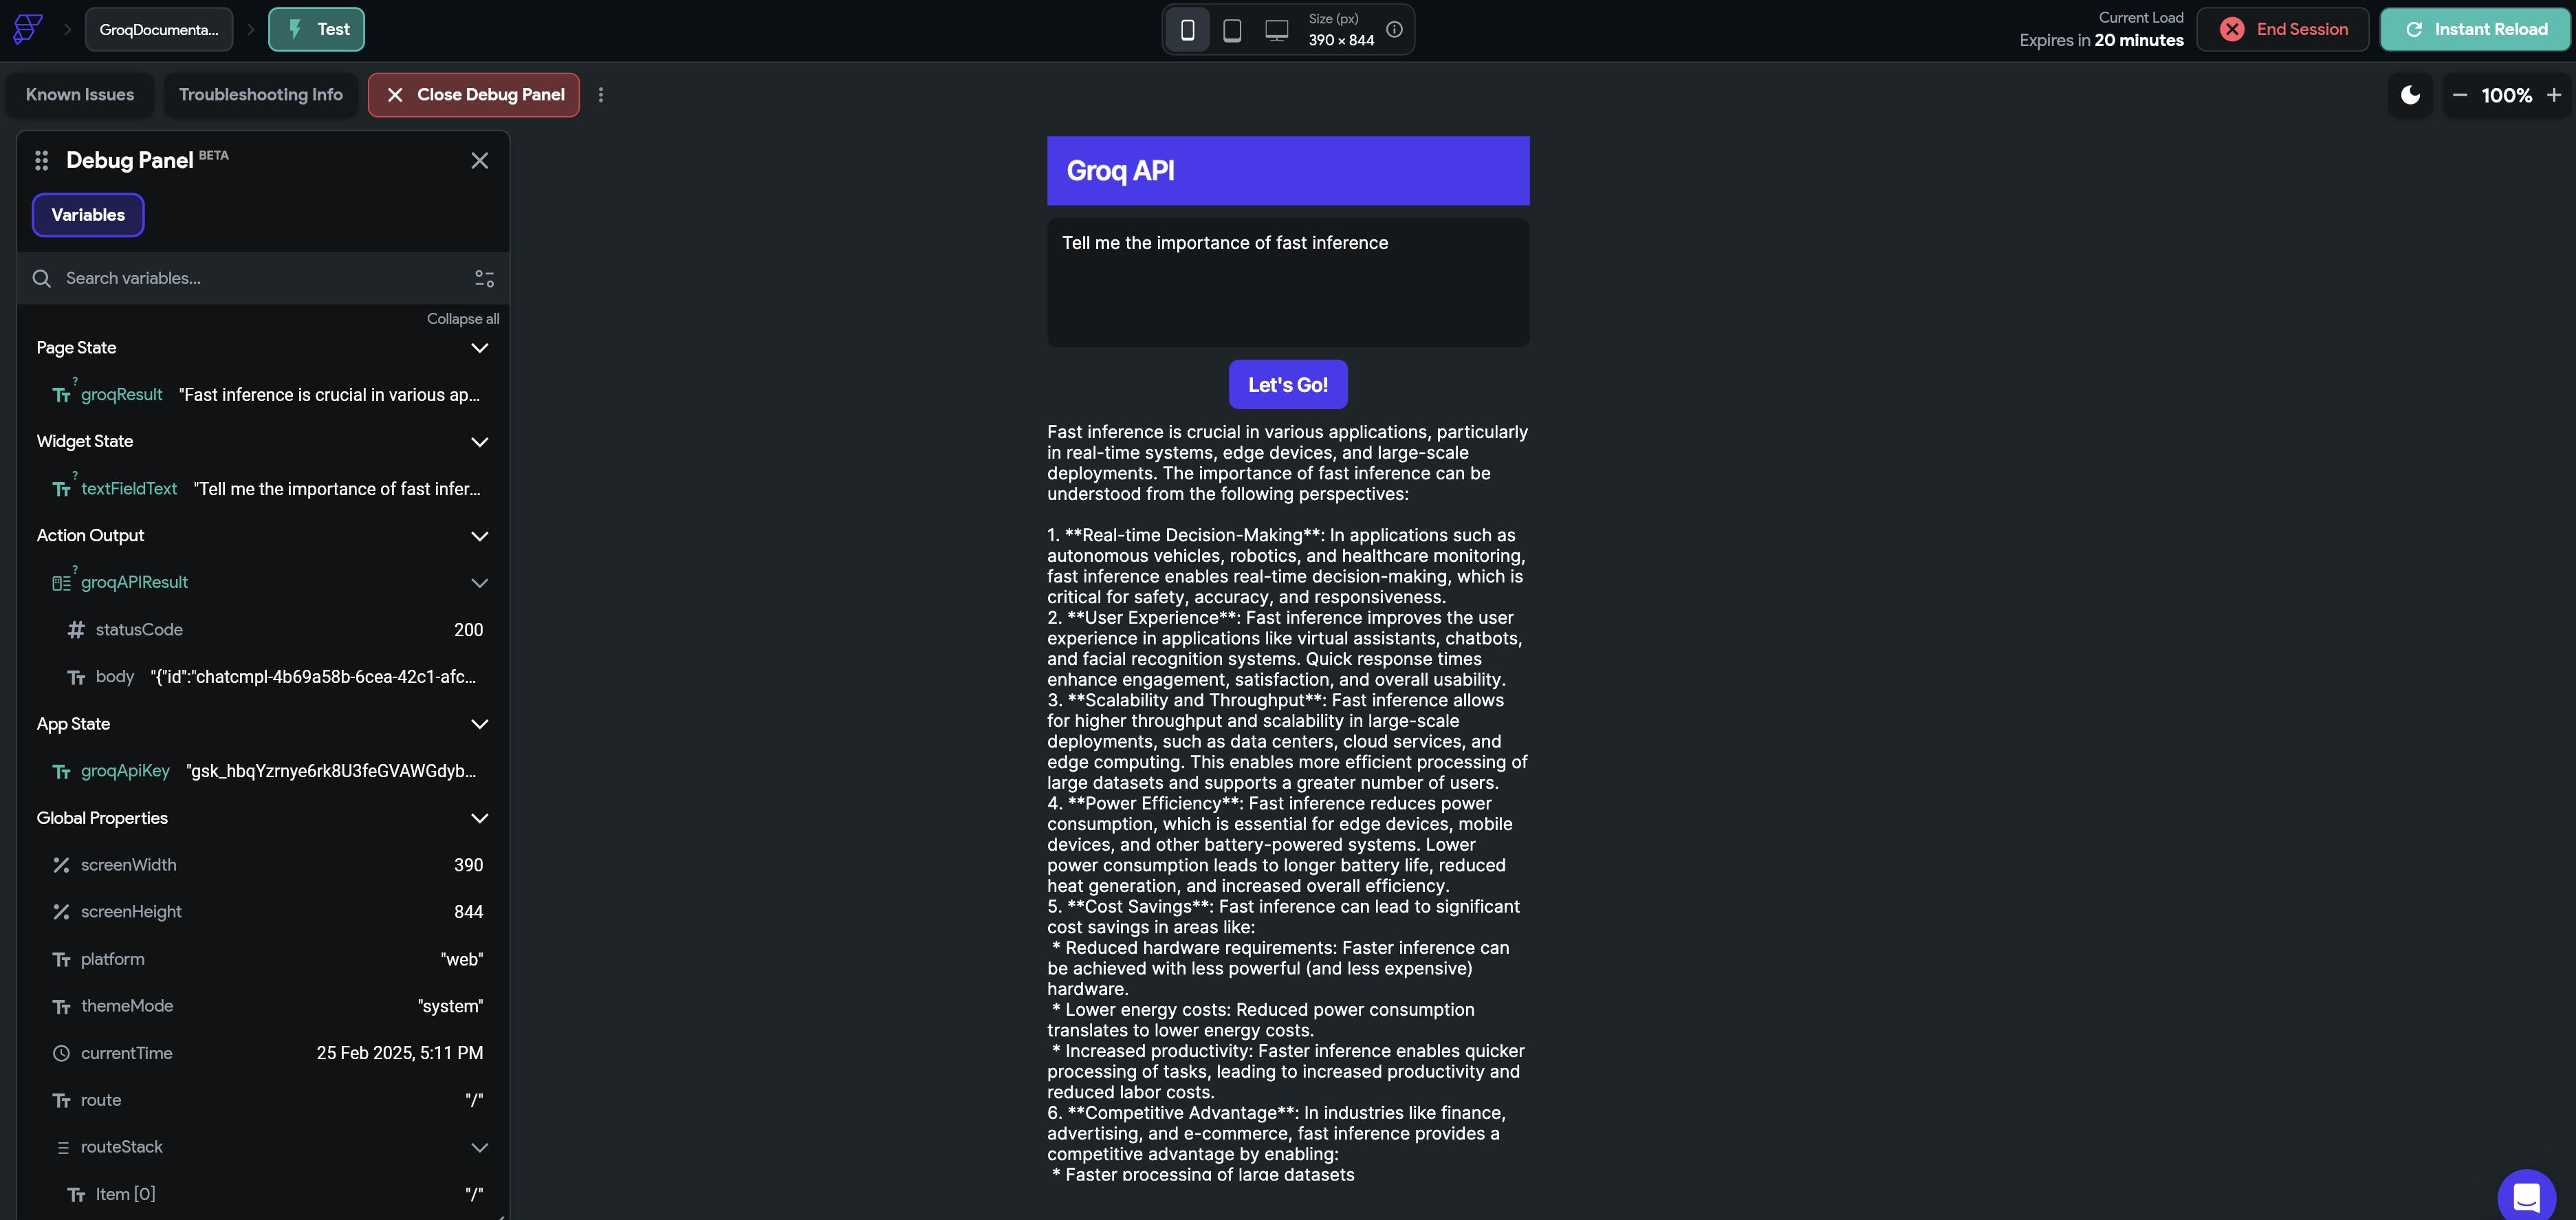
Result from Test mode session
Challenge: Add to the above example and create a chat-interface, showing the history of the conversation, the current question, and a loading indicator.
Additional Resources
For additional documentation and support, see the following: